Sunday, 6 May 2012

Cold War: BAOR

Lenin kindly painted some more Mongrel NATO figures to add to my existing ones to enable me to field a full platoon for Force on Force:


Thursday, 3 May 2012

The Mutiny: HEIC Artillery

And now some support for the British, the Honourable East India Company artillery battery:


Wednesday, 2 May 2012

Geek & Sundry: Small World

If you haven't spotted it already Wil Wheaton hosts a boardgame show on the new Geek & Sundry channel on YouTube.  Here is the first episode on the Days of Wonder game, Small World:

The Mutiny: Mutineer Artillery

And now some irregular Indian artillery:

Tuesday, 1 May 2012

The Mutiny: Sepoy Artillery

Once again from Mutineer Miniatures, the Sepoy artillery (are they loyal or mutinous?):

Monday, 30 April 2012

Sunday, 29 April 2012

Wargames Weekend: The Photos

Wargames Weekend: The Boat Race 1857

Our final game was a quick skirmish set during the Indian Mutiny using the Two Hour WargamesBlack Powder Battles rules (not to be confused with the similarly named rules from Warlord Games!):

The British are fleeing from the hordes of mutinous sepoys. They are everywhere but the river seems to offer the best chance of escape. The only thing standing between them and it is a group of Badmashes who are causing some mayhem around the jetty.

Lenin took command of the three parties of British fugitives, Captain Maurice Oxford and three men of the 32nd escorting Miss Mary Riley, Lieutenance Austen Cambridge and three men of the 53rd escorting Lady Melissa Wolseley and Lieutenant, the Honourable, Percy Riley and three volunteers escorting Miss Margaret Vanden-Plas.  His objective was simple, if not easily achieved - get to the boats at the jetty and cast off.

Three small parties arrived through the woods from Krishnapur via separate paths closely pursued by some mutinous sepoys.  Between them and freedom was a small village currently being searched for loot by several groups of badmashes.
The three groups managed to get close to the village without being spotted but eventually they caught the attention of the ruffians and shots were exchanged.
With most of the badmashes only being armed with tulwars they decided to take the fight to the firinghis; however, Captain Oxford and Lieutenant Cambridge were prepared, and their men well trained, so the badmashes ran headlong into some lively fire.  Lieutenant Riley was less lucky and his party were suddenly fighting for their lives.
With two groups of badmashes having been dealt with Oxford and Cambridge raced toward the jetty.  Unfortunately for Riley, with his party still engaged in a desperate fight with the badmashes, this allowed the sepoys to catch up and they soon came under fire from the rear.  Two of the volunteers were killed and after a short struggle Miss Vanden-Plas was cut down.

The sepoys rushed forward to catch the escaping British but a firing line had been formed to cover the withdrawal making life very difficult for them.
With the remaining ladies safely on the boats the soldiers began an orderly withdrawal and despite some firing from the sepoys managed to move away downstream with only a couple more casualties. 

Saturday, 28 April 2012

Wargames Weekend: The Lost Temple

Our penultimate game was a chance to try out the Triumph and Tragedy rules and for Lenin to get some of his Pulp figures back to the table.

An female American archeologist has discovered an ancient temple in the jungle; a temple which is reputed to contain a valuable treasure.  This expedition has angered the local Chinese warlord who considers the temple to be part of his domain and obviously wants to claim the treasure for himself.  His men have occupied the temple and taken the archeologist hostage.  This, in turn, has upset the Americans who have sent a gunboat to rescue her.
I took the part of the Warlord and his, mostly raw, troops; whilst Lenin played the American sailors from the gunboat.
I placed my only trained men along with another raw unit in the temple guarding it and the archeologist.  Meanwhile my remaining unit and maxim gun team remained in my stronghold.  Hearing that the gunboat had landed some troops I ordered the units at my stronghold to march to reinforce the men at the temple.
We spotted the Americans advancing through the jungle and deployed to engage them.  Things were going well until they deployed their BAR (which whilst a rather poor LMG was enough to automatically pin raw troops).  This meant that my maxim was deployed but didn't get to fire.  My riflemen opened fire, causing some casualties but soon also came under fire from the BAR.

Meanwhile the other American unit was advancing on the temple.  A firefight rapidly ensued with both sides taking casualties but I had a slight edge as my men were defending the temple.
With my reserves falling back the first American unit swung round and advanced towards the front of the temple.  Another firefight began.  With units being gradually whittled down on both sides Lenin decided to assault my position.  His men rushed forward but after a bloody melee were thrown back.  Whereupon my hero leapt up and engaged them with his SMG.  This was the last straw for the Americans and they withdrew.

Whilst the game was fun I'm not sure about the rules.  I have a feeling it's something to do with my expectations relating to the "scale" of a game.  Where you have a very small skirmish I can easily accept these operating in a more hollywood or pulp style.  It can even work when units are added but are merely extras to provide a backdrop for the heroes; however Triumph and Tragedy feels like a unit based game with the heroes acting as units.  My first impression is that this feels a little uncomfortable.  I expected the game to be more "realistic" as it was unit based.  I suspect it will need another go to see if they gel for me.

Friday, 27 April 2012

Wargames Weekend: Who will rid me of this turbulent (Shinto) priest?

Our fourth game was a chance to try the Bushi no Yume rules by Rich Jones of Surf Shack Games.  We decided on a simple scenario with me playing some Ninja (or is it Ninjas?) who have been sent to deal with a Shinto priest who has been causing trouble; however, the priest is currently being guarded by several samurai.  I was given the choice of having more cinematic ninja (i.e. easier to kill but more of them) or more "realistic" ones and chose the former.

Lenin set up with the samurai on guard and I approached from the wood and the stream.
Things started well with my stealthy approach going undetected but, as was bound to happen, one of the samurai spotted one of my ninja.  Combat ensued but the samurai didn't simply slice my ninja in two as I had expected (result!).  Meanwhile my other ninja continued to sneak closer using all the available cover.
Eventually some of my ninja reached the compound wall but another had been spotted and was quickly dispatched by the samurai.  My leader lept dramatically over the wall followed by two other ninja and dashed into the building in which the priest was hiding; however, my first attack only wounded him.

The samurai were about to rush to the priest's aid but found the doorway concealed one of my men and the others took the opportunity to throw shuriken at the other samurai but they managed to close for combat.
The ninja guarding the doorway was quickly dealt with and one of the samurai moved to engage my leader, giving the priest the chance to escape from the building.  More shuriken were thrown by the other ninja but priest slipped around the back of the building.

With most of the samurai outside the wall occupied with dealing with my ninja, I managed to slip past one and follow the priest.  More combat ensued and finally I managed to dispatch the priest.

It was a fun game.  I had been worried that with my record of dice rolling, I would find the activation system frustrating but things did even out a bit (probably as I had quite a few figures).  My ninja didn't turn out to be quite as easy to kill as either of us had expected but I'm not sure how much of that was simply the luck of the dice.  It's clear that these rules have been a labour of love for Mr Jones as they are stuffed full of theme and appropriate terminology which did make them a little daunting to those of us with a lesser level of knowledge of the genre but helps the feel.  Overall I wound't mind trying these again.

Wednesday, 25 April 2012

Wargames Weekend: Chuffy's Challenge

Day two began with a journey into alternative history with another game set in the A Very British Civil War world. This game was a follow on from Ashford Ambush which we played last year.

With the Government and Mosleyite forces cracking down on any democratic protest various groups in Kent have decided to take matters into their own hands. A joint operation between the working class Cinque Ports T&GWU Militia and the, mainly upper and middle class, Kent Militia secured more ammunition through ambushing a convoy transporting weapons and ammunition to the Territorial Army barracks in Ashford.

Having split the spoils the T&GWU have returned to Dover and the Kent Militia headed to Chuffnell Regis to meet with the Anglican League. Unfortunately the fascists have got wind of the meeting and a combined force of Police and BUF are on their way to break up the meeting. The Territorials are also on their way to expunge their shame in losing the weapons and ammunition.

Once again Lenin took charge of the Rebel factions and I took the Fascists. Mr Chomondley-Warner and his Militia arrived on the road from Ashford with their loot from the previous encounter. Meanwhile, Commandant Spode, his contingent of BUF and Inspector Chisholm and his policemen arrived on the road from London.
The BUF worked their way through some barbed wire but were soon spotted by Mr Yeatman and the Anglican League troops from their defences in the grounds of Chuffnell Regis and came under some unexpectedly heavy fire. The Commandant Spode quickly recovered from the surprise and ordered his men to return fire. Meanwhile Inspector Chisholm dismounted from the front of his Black Maria and moved his officers into a covered position along the road and also engaged the League. Seeing his verger receiving heavy fire Reverend Farthing suggested to his men in the Manor House that they might, if it wasn't too much trouble, open fire on the BUF.
With Sergeant Blakey ensuring the BUF remained steady, the Commandant co-ordinated their fire and the combination of that and the police started to take its toll on Mr Yeatman's men.

Eventually the Anglican League were worn down and the police moved in to arrest Mr Yeatman for causing a serious affray. He was asked to accompany them back to the station.

Meanwhile Mr Chomondley-Warner's convoy arrived at Chuffnell Regis with the Territorials close on his heels. Fortunately "Chuffy" Chuffnell was ready to take charge of some of the men and organised them into a defensive position near the front of the manor. The Territorials advanced up the Ashford road led by their Lancia armoured truck. Almost immediately they came under fire from a lewis gun in the main house well directed by Lord Belborough. Without the tactical direction of Lieutenant George the men in the armoured truck decided things were too hot for them and began to fall back. Commandant Spode moved the BUF forward and engaged Chuffy and his men to devastating effect. Cyril "Barmy" Fotheringay-Phipps bought it and having taken some serious casualties with only him and his man Brackett remaining, Chuffy decided to retreat to the manor house.
The BUF then moved to assault the manor house from the side but on their way across the lawn they found that Lord Belborough had redeployed the lewis gun and they came under heavy fire. Sergeant Blakey caught a round and having taken significant losses the BUF decided to fall back.

With the remaining Anglican League redirecting their fire onto the police, Inspector Chisholm decided discretion was the better part of valour and began to withdraw his men with their prisoner.  And so Chuffnell Regis (and the munitions) were saved.

Tuesday, 24 April 2012

Wargames Weekend: The Battle of the Fords

Next up was a Dark Ages game, both to get some of my figures, which haven't been out in a while, back to the table and to give Saga another outing. It was also a chance to put the other faction dice and accessories I picked up at Salute some use.

We decided to use the standard 6 point warbands and scenario 2 - the Battle of the Ford from the rules. Lenin chose to be Anglo-Danish whilst I was to be Norman (which we decided placed the engagement nicely in the post-Hastings period). Lenin took a large (8 figure) unit of axe armed Huscarls (Hearthguard), three units of Ceorls (Warriors) and a unit of Geburs (Levy) whilst I opted for two units of mounted Knights (Hearthguard), one unit mounted and three units dismounted Sergeants (Warriors) with one of the foot units armed with crossbows.
Lenin rolled highest and deployed half his force, I then deployed and he finished off. It was clear we had both chose to split our men between the two fords with the Huscarls and Knights concentrated on the ford to my left. Having forgotten how the last game played out I had deployed my Warlord in the centre rather than with one flank or other.

Deciding that I needed to take advantage of my mounted troops I advanced my crossbowmen and fired and then, rather too impetuously, charged one of my units of Knights across the ford and into the approaching Huscarls. As might be expected I had my backside thoroughly kicked and started to remember how much planning needs to go into attacks if they are to be successful!
Lenin then advanced his Geburs, armed with bows and slings, to engage my crossbowmen in the centre. With his Warlord over on his right flank I could see an attack happening there, so I advanced my Warlord and second unit of Knights supported by some dismounted Sergeants to cover that ford.

Lenin also started to organise his Ceorls on his left. Again I got a little impetuous and advanced my mounted Sergeants across the ford and into his leading unit of Ceorls. Once again this didn't quite go as planned and my men were repulsed with quite a few casualties.
Leaving his battered Hurcarl unit (they had taken some damage from my charge and volleys of crossbows), Lenin used the Obey Me command to advance his Warlord and his Ceorls) across the ford and attacked my Warlord. Fortunately I had anticipated the attack and had allocated some dice to my Charge! and Stamping abilities and so was able to throw his assault back - although it did cost me one of my Knights who valiantly threw himself in the way of a killing blow. I then returned the favour and, using the same approach, attacked his Warlord with mine and my remaining mounted Knights. A combination of good dice rolls and the Charge! attribute saw his Warlord trampled into the dust and his Ceorls decimated after defending the Warlord with their lives. But my follow up attack saw my Warlord struck down too. Lenin then attacked my mounted Sergeants at the other ford but luckily I managed to throw him back.

At this point, with dinner approaching, and neither of us successfully made the other bank of the stream we decided to call the game a draw.

As in our previous game it quickly became clear that Saga is all in the planning - something I really need to remember. Working out which attributes to use and when is critical - just rushing in without preparing the ground is likely to get you killed! The Warlord is key, his free activation and Obey Me ability can be enormously valuable but you don't want to lose him - even if this isn't a victory condition - as it hits you where it hurts - in the dice pool!

Wargames Weekend: Flight to the West

Our first game on the day after Salute was another outing for Force on Force this time using the Cold War Gone Hot supplement. The scenario was a follow up to a game we played just over a year ago (it's scary how quickly time passes) which was played using a tweaked version of Nuts! Lenin has painted some more Mongrel BAOR for me and this was a good chance to get that larger force onto the table.

19th August 1986
Nr. Hessen, West Germany
Having failed to retake the bridge at Arlosen, the remnants of the British 5th (Volunteer) Battalion of The Queen's Regiment, are ordered to withdraw to a new defensive line.
BAOR Mission: Break through any Soviet blocking forces and exit to the west.

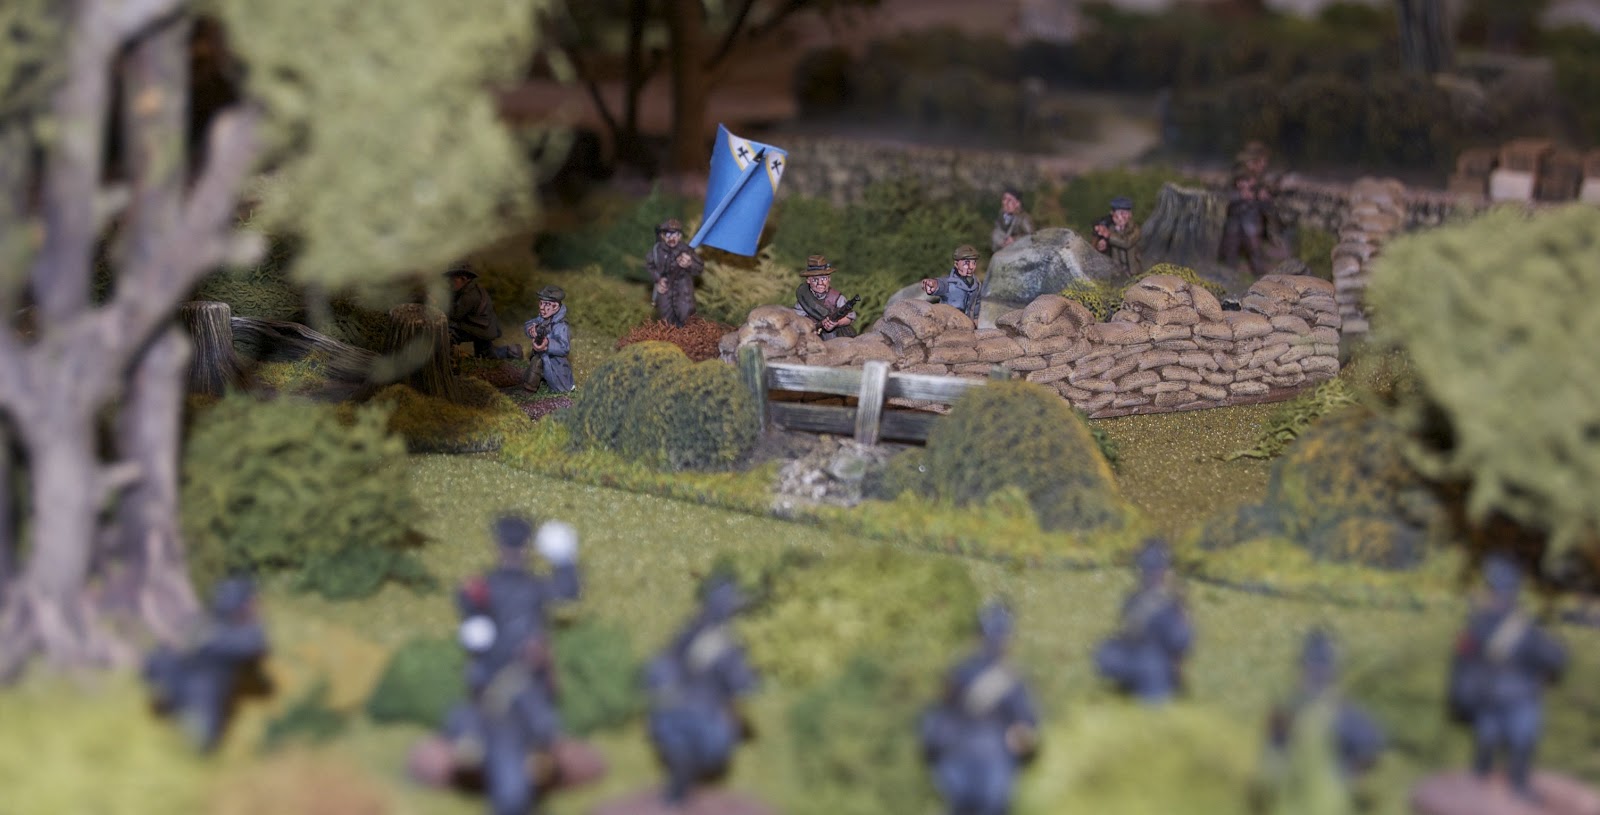
Replicating our previous roles I took command of the BAOR platoon and Lenin the Soviets. The terrain was woods and low hills with the road running away to the west over a small river. There were a couple of buildings, a barn ahead to the left of the road beyond a small wood and a house just over the bridge.

I decided on a relatively cautious approach. I had the men dismount from the vehicles and sent a section forward to each flank, advancing by bounds to clear the woods on either side of the road. These cleared the sections then advanced from the woods to the barn, on the left, and to some more woods on the right. I then had the Saxon advance up the road accompanied by the third section on foot.
Things were going well, if a little slowly, as the section on the right was held up advancing through the thick underbrush. At this point the centre section came under sniper fire from the house ahead. They returned fire but in an attempt to put more fire down I, rather rashly in hindsight, had a fire team and the Saxon advance to give fire support. This moved it forward ahead of the wood line to the right and into the line of sight of a Soviet unit on some high ground across the river.
An RPG round came winging its way toward us and the Saxon was disabled (fortunately the crew were able to bale out unharmed). Fortunately a drainage ditch provided some good cover for the fire team from the accompanying small arms fire. I had the section on the right advance through the woods and engage the Soviets on the hill.
The section to the left, having cleared the barn, advanced to the next wooded area between them and the river. Meanwhile firefights were going on between the Soviet sniper team and my fire team from the centre section and between the right section and the Soviets on the hill.

The section on the left cleared the woods but on emerging from the far side were engaged by another Soviet group in some more woodland over the river.

Eventually my greater weight of fire on both the left and the right began to take its toll but the sniper team were proving rather too resilient for my liking. I decided to advance the other fire team from the centre section but, in doing so, revealed a third Soviet group in some woods farther to the right. Fortunately the fire team made it to some cover only sustaining a single casualty and began to return fire. That team didn't have either a GPMG or a bren so they decided to use the only heavy weapon available to them - a Carl Gustav. This extra weight of fire made all the difference and we were slowly making headway.
At this point the turn limit for the game came up and, when we totted up the victory points, it was a Soviet win by two points. I had been let down by only using ranged fire to engage the enemy rather than pinning them and advancing to close combat. Lenin kindly pointed me to some training videos on YouTube which are handily from just the right era!

Force on Force provided a fun game and once you have a feel for the mechanisms and numbers of dice to roll it moves along very easily.

Sunday, 22 April 2012

Salute 2012

I went up to the Salute show yesterday along with Lenin. I decided to take a slightly later train this year to avoid standing in the queue too long. When we got there at about twenty-five to 10 the "Q-Buster" queue was almost out the front door of ExCeL. Despite this they managed to get us through the door before 10am and before the pay on the day crowd. It's nice to be able to get in and have a look around before it gets too busy.

The day was mostly filled with meeting up with people both new and old. It was good to be able to see Ray, Lee and the Angry Lurker in person but I also managed to catch up with some old friends I haven't seen for over 15 years - so much so I completely lost track of time and missed the scheduled meet up - doh! (Sorry guys! Maybe next year?)

As for the shopping, I picked up some more 15mm WSS from Black Hat, some Mutineer Naval Brigade (which I wasn't intending to get but was distracted by some recent inspiring pics - Please expect some hate mail from my wife Mr Awdry! :-) plus some other small bits and pieces.

I have to say that I am starting to notice my age lately and my hip is still aching from all the walking and standing around chatting.  There were some lovely looking games and more interesting stuff on the various stands than I had expected - so all in all it was a good day.

We decided to combine the show with a wargames weekend so expect some posts from the games over the next few days.

Sunday, 15 April 2012

Tatya Tope

Ramachandra Pandurang Tope, popularly known as Tatya Tope (or Tantia Topee and various other spellings), was born in Yeola in 1814 and his opposition to the British is reputed to have begun when James Andrew Broun-Ramsay, 1st Marquess of Dalhousie deprived Nana Sahib of Tope's father's pension.

Tatya Tope was Nana Sahib's close associate and general. Following the Siege of Cawnpore the British Forces accepted Nana Sahib's offer of safe passage to Allahabad; however many were either killed or captured. The forces under the command of General Henry Havelock advanced towards Cawnpore and the two forces sent by Nana Sahib to oppose them were defeated. When it became clear that the attempts to use the captives to bargain with the British had failed, an order was given to murder the women and children. The sepoys refused to kill the captives, but some of them agreed to remove the women and children from the courtyard, when Tatya Tope threatened to execute them for dereliction of duty.

Both Nana Sahib and Tatya Tope escaped from the Cawnpore just before it was finally captured by the British. Tatya Tope continued the fight by gathering a large army, mainly consisting of the rebel soldiers from the Gwalior contingent, to recapture Cawnpore. His 6,000 strong advanced guard dominated all the routes west and north-west of Cawnpore; however, they were defeated by Sir Colin Campbell's forces.

Tatya Tope then joined with the Rani of Jhansi but after her death he launched a successful campaign in the Sagar, Madhya Pradesh and Narmada River regions and in Khandesh and Rajasthan. British forces failed to subdue him for over a year but he was betrayed by his trusted friend, Man Singh, Chief of Narwar while asleep in his camp in the Paron forest and captured by General Richard John Meade's troops. After being escorted to Shivpuri, he was tried by a military court. Tope admitted the charges brought before him but said that he was answerable to his master Peshwa only. He was executed on April 18 1859.
These figures, along with the Rani of Jhansi, make up the Indian Leaders pack from Mutineer Miniatures.

The Rani of Jhansi

Lakshmi Bai, the Rani of Jhansi, was originally named Manikarnika and was born at Kashi to Maharashtrian parents. Her father worked at the Peshwa court of Bithoor and, following the loss of her mother, the Peshwa brought her up like his own daughter.

She studied self-defence, horsemanship, archery, and even formed her own army out of her female friends at court. Tatya Tope, who would later come to her rescue during the 1857 Rebellion, was her mentor.

She was married to Raja Gangadhar Rao Newalkar, the Maharaja of Jhansi, in 1842, and thus became the queen of Jhansi. After their marriage, she was given the name Lakshmibai. After their first son died when he was about four months old they adopted Anand Rao, the son of Gangadhar Rao's cousin, and later renamed him Damodar Rao. On the death of the Raja the British East India Company, under Governor-General Lord Dalhousie rejected Rao's claim to the throne on the basis he was adopted and annexed the state to its territories.

When the Mutiny began in 1857 the British were forced to focus their attentions elsewhere and Lakshmibai was essentially left to rule Jhansi alone. She led her troops swiftly and efficiently to quell skirmishes initiated by local princes and maintained a relatively calm and peaceful city in the midst of the unrest in northern India.

At some point she decided to join the rebellion and Jhansi was besieged by British troops under Sir Hugh Rose on 8th June 1858. An army of 20,000, headed by Tatya Tope, was sent to relieve Jhansi but failed to do so following an engagement with the British. Shortly after the besiegers were able to breach the walls and capture the city. The Rani escaped by night with her son, surrounded by her guards, many of them women.

The Rani decamped to Kalpi where she and her troops joined other rebel forces, including those of Tatya Tope. The two moved on to Gwalior, where the combined rebel forces defeated the army of the Maharaja of Gwalior and occupied the fort there. However, on 17 June 1858, whilst engaging the 8th (King's Royal Irish) Hussars in her full warrior regalia she was killed and her body burned.

General Sir Hugh Rose is recorded as saying that the Rani was "remarkable for her beauty, cleverness and perseverance" and had been "the most dangerous of all the rebel leaders".
The figures are part of the Indian Leaders pack from Mutineer Miniatures.

General Sir Henry Havelock

Henry Havelock was the son of a wealthy shipbuilder and the second of four brothers.  Initially pursuing a legal career, a misunderstanding with his father led to his studies being interrupted and this course having to be abandoned.

Through his brother William, who had distinguished himself in the Peninsular War and at Waterloo, Henry obtained a post as second lieutenant in the 95th Rifles and was posted to the company of Captain Harry Smith, who encouraged him to study military history and the art of war. Despite a promotion to lieutenant he did not see much active service and so, in 1822, he decided to transfer to a regiment destined for India.

Havelock served with distinction in the First Anglo-Burmese War (1824–1826) and the First Afghan War in 1839, these and the Sikh Wars saw him rewarded for his service and his distinguished conduct with promotion to full Colonel and an appointment as Adjutant-General to the British Army in India in 1857.

In the same year, he was selected to command a division in the Anglo-Persian War, during which he was present at the action of Muhamra against the forces of Nasser al-Din Shah under command of Khanlar Mirza. Peace with Persia released his troops just as the Mutiny broke out. He was chosen to command a column to deal with the rebels in in Allahabad, to support Sir Henry Lawrence at Lucknow and Wheeler at Cawnpore. Throughout August Havelock led his soldiers northwards across Oudh, defeating all rebel forces in his path, despite being greatly outnumbered. Three times he advanced for the relief of the Lucknow, but concerned by the condition of his troops he held back until finally, reinforcements arrived at last under Sir James Outram. With these forces Havelock was able to capture Lucknow on 25 September 1857. However, a second rebel force arrived and besieged the town again catching Havelock and his troops inside the blockade. Unfortunately only a few days after this siege was lifted he died on 24 November 1857 of dysentery.
These are the other half of the Mutineer Miniatures British Generals pack.

The picture at the start of the entry is of the statue in Trafalgar Square in London, inscription of the plinth of which reads:

To Major General Sir Henry Havelock KCB and his brave companions in arms during the campaign in India 1857. "Soldiers! Your labours, your privations, your sufferings and your valour, will not be forgotten by a grateful country".

Sir Colin Campbell

Born Colin Macliver, the eldest son of a Glasgow carpenter, he adopted his mother's maiden name when he enlisted in the army.

After a year he was appointed as an ensign in the 9th Regiment and fought in the Peninsular campaign under Wellington including at Rolica and Vimeiro; the advance to Salamanca and retreat to Corunna.

Promoted to Lieutenant he spent time attached to the Spanish army but rejoined his regiment serving at the battle of Vittoria and the siege of San Sebastian. On 17 July 1813 Campbell led the attack on the fortified convent of San Bartholomé and a week later he led the unsuccessful attempt to storm the fortress itself.

His courage saw him recommended for promotion and he was given a company in the 60th rifles; however this rapid rise slowed somewhat with him taking almost another thirty years to rise to Colonel.
After various postings, in 1841 Campbell went to China was involved in the First Opium War. He was mentioned in despatches, appointed aide-de-camp to the Queen and it was then he was promoted to the rank of Colonel.

He became a Brigadier-General in 1844 and fought in the Sikh Wars in India. Wanting to return to England and retire he resigned his command but in 1854 he was offered the command of one of the two brigades which were to be sent to the Crimea; this appointment was extended to commander of the Highland Brigade of the 1st Division under the Duke of Cambridge. This led to his promotion to Major-General. He fought at the battle of the Alma and was appointed as commander at Balaclava;  however, he became disillusioned and briefly left the Crimea but was persuaded to return and was promoted to the rank of Lieutenant-General taking command of a corps under Codrington; but Campbell only commanded the Highland Division for a month and then returned to England.

On 11 July 1857 the news of the Indian Mutiny and the death of the commander-in-chief in India led Lord Palmerston to offer Campbell the post which he accepted. The following day he left for India, arriving in Calcutta in August.

After spending over two months in the Indian capital organising his forces, Campbell successfully relieved Lucknow for the second time; however, following the relief he chose to abandon the position to the rebels finally retaking it in March 1858.  He continued in command of operations in Oudh until the mutiny was finally extinguished.
The figures are half of the British Generals pack from Mutineer Miniatures.

The Mutiny: Defenders of Lucknow

I have just finished basing up some more additions to my Indian Mutiny collection.  Once again they are from Mutineer Miniatures.
First up are the Defenders of Lucknow, six civilian figures intended to represent Dr Ogilvie, Mrs Halford and her daughter, Colonel Halford, Mr Polehampton and Wuzee Khan the servant according to the Mutineer website.

The figures are armed with either pistols or muskets and will make a useful addition to my future games.

Saturday, 7 April 2012

Suicide Hill

I managed to get down to the club on Thursday and was treated to a 15mm Spanish Civil War game using the TooFatLardies' Triumph of the Will rules.

The game was the Suicide Hill portion of the Battle of Jarama in February 1937.  I had command of the Nationalist left wing including Foreign Legion, Regulares and Carlist troops facing Franco-Belgian volunteers under John with Eric and Daniel taking the centre and right wings respectively.

As we advanced across the open ground we came under rifle, machine gun an artillery fire which took a serious toll.  Eric had the challenge of winkling out some Republican militia from some hard cover on the high ground in the centre which slowed him up somewhat.

My front units took something of a pounding but we continue to advance and eventually closed on the Franco-Belgian units.  They fought valiantly but my better trained and more aggressive troops bested them but not without taking some serious casualties.  Pushing ahead towards our objective, a cross roads well behind the Republican lines, I managed to punch a hole through their units but then came under more artillery fire.

The Republicans moved some of their reserves to plug the gap.  With Eric's troops having fallen behind I was worried that the Republicans would be able to wear me down and stall the advance.  The British Battalion were apparently putting up some fierce resistance to our advance.  Fortunately, our pressure in the centre and on the right was causing them some serious losses.

I deployed my artillery and began counter battery fire which quickly put the Republican guns out of actions.

I threw my Moroccan Regulares forward to assault the Republicans holding the crossroads but after some bloody fighting was thrown back with heavy casualties.  With most of my units spent, Eric changed my orders from attack to engage and I dug in and engaged them with my machine guns whilst I brought the remainder of my Carlists and the Legion up (after they had finished mopping up).

In the end the Republicans conceded victory as they couldn't hold the crossroad.  But we all agreed it could only be considered a minor one as all the Nationalist forces were spent.

All in all a fun game and a result very close to the historical one.

50,000 Pageviews!

A big thank you to all of you who have spared a few moments to read my various witterings.  It's nice to know that I'm not talking to myself!

Whilst the current economic climate has slimmed down my project list I expect there will be enough going on to fill a few more posts.  As it is Salute 2012 is rapidly approaching and will be combined with another wargames weekend, so expect some posts and photos from that.

I am also in the process of basing up a small batch of Mutineer Miniatures figures for my Indian Mutiny project along with some 1980's Soviets and WW2 British Paras - so there should be some photos of those coming up in the next couple of weeks.

So despite the excitement of reaching 50,000 pageviews, I shall try to keep calm and carry on...

Saturday, 24 March 2012

Maurice

The latest set of rules in the Honour series from Sam Mustafa (author of Lasalle and Might & Reason) is now available for pre-order.

Maurice is intended to cover the period from the Wars of Louis XIV up to the French Revolution.  It has a campaign system and the rules themselves are card driven.

More details are available on the Introductory Flyer and a "lite" version of the rules is also available for download along with some sample pages from the rules from the site.

Northstar are handling the UK sales and have the rules and cards available for pre-order (£25 and £10 respectively or £30 together).  The pdf version can be ordered direct from Sam Mustafa.

Great and Glorious Days

Having read and enjoyed both the books by James Faulkner in the Battleground Marlborough series (Blenheim 1704 and Ramillies 1706), I decided to move Great and Glorious Days: Marlborough's Battles 1704-09 by the same author up my reading list.

This book is written in the same very readable style as the other two books and covers the Marlborough's major campaigns of the War of the Spanish Succession. As you would expect it includes the storming of the Schellenberg and the battles of Blenheim, Ramillies, Oudenarde and Malplaquet.

Having read the other two books the earlier sections cover the same ground and whilst not identical are unsurprisingly very similar.   The other campaigns and battles are covered to a equivalent level and suffer (from a wargamer's perspective) from not having a little more detail on the units and orders of battle.

This is certainly a good introduction to Marlborough and is very accessible.  I enjoyed it but am now looking for something with that greater level of detail.

Pike & Shotte Rules

Warlord Games have announced that the new addition to the Black Powder rules family - Pike & Shotte - are now available for pre-order.

I had thought that these rules were intended to cover the Thirty Years War and the English Civil War but according to Warlord's announcement they have been expanded to include the Italian Wars, the Tudor Wars in the British Isles and the War of the Grand Alliance.

I am in two minds about ordering them as I know they will be nicely produced with some lovely eye candy and I do have both Tudor Wars and Montrose figures that I could use with them; however, I am still not entirely sold on the Black Powder system.

In any event, if you are interested Amazon have them available for pre-order at a significant discount - £19.50 as opposed to the £30 RRP.  Although you won't get the free miniature that Warlord are offering.

If you're interested I've popped an Amazon affiliate link below:

Saturday, 17 March 2012

SAGA: Northern Fury

Gripping Beast have announced the first supplement for Saga, their Dark Ages rules.

The supplement includes four new factions: Anglo-Saxons, Bretons, Jomsvikings and Scots, all with new battleboards.  The first three utilise the existing Anglo-Dane, Norman and Viking dice but the Scots have their own new dice set.

A new multi-player scenario is also included.

The supplement is 22 pages long, £12 and Gripping Beast are taking pre-orders for the book, the Scots dice and some appropriate figure packs on their website.

Sunday, 11 March 2012

Ramillies 1706 - Year of Miracles

Having read and enjoyed James Falkner's book on Blenheim, I decided to pick up the companion volume on Marlborough's next major victory - the Battle of Ramillies.

As you might expect this book is written is the same style as the Blenheim one and so is quite accessible.  It is only a fraction longer than the other volume, coming in at 144 pages.  Unfortunately it lacks an Order of Battle but otherwise I found it an excellent primer on the battle.

The book starts with some biographical notes which is pretty handy if you aren't familiar with the main characters of the period, especially as some have proper names along with their titles.

In a way Ramillies was a greater victory for Marlborough than Blenheim despite the fame of the latter, as it was won without the help of Prince Eugene of Savoy and against a French force of almost equal size in a good defensive position.

I have now moved on to Falkner's larger and broader volume - Great and Glorious Days - which covers some of the same ground as the Battleground volumes but much more besides.

Project Update

Having pretty much completed the first phase of Mahdist War project and with my Indian Mutiny project nearing a similar state I thought I would take a look at how things are shaping up. My major project for this year will be my 15mm Marlburians with a couple of other minor ones on the side (budget permitting); however, Lenin decided to get his DPM paints out and so a couple of "modern" projects have jumped the queue. I say "modern" but given both of these are really 1980's I wonder whether we need an alternative term given we're talking about 30 years ago! As someone pointed out to me a couple of weeks ago, if they filmed Back to the Future now Marty McFly would be going back to 1982 (now that's scary - it only seems like last week to me...). Anyway, onto the update:

28mm Falklands War

With this year being the 30th anniversary of the Falklands War, I thought it would be appropriate to expand my collection to include it - with a view to being able to use some of the British troops for other things (see below).

Initially I wondered about doing this at 15mm (and that still has its advantages); however, I had a chance to get some 28mm Royal Marines from a friend of mine so that rather decided things.  The figures are from the Gripping Beast Mo-Fo moderns range, so I have acquired a few more figures from the same range to bulk out the Marines and add some opposition.  This will give me around a weak platoon for each side which should be plenty for my table.

As to rules, there is a scenario covering the encounter at Top Malo house in the Force on Force book so that's clearly a possibility; however, I may drop down to using Chain Reaction/Nuts!

28mm Cold War Gone Hot

I had been interested in doing something in this genre for quite a while before the Force on Force supplement came out.

Indeed we have already played a couple of games based on this previously (for the latest see here) using some of my existing figures and Lenin's Soviet paras.

The germ of the idea came when I started collecting the rather lovely Mongrel modern British (originally for Northern Ireland - see here for photos) followed by some of their Soviets for Afghanistan.  World War 3 was a chance to get these figures to the table a little more often.  As I didn't have enough British Infantry nor were a number of the Afghanistan invasion Soviets suitable for Europe I decided to pick up a few more figures.  I have the Soviets on the workbench being based up at the moment.

As to rules, once again this is a toss up between Force on Force and Chain Reaction/Nuts!

Lenin is hoping to have some more figures ready for Salute so I should be able to get some photos up around then.

With these side projects queue jumping I suspect I will have to limit what else I am able to start this year but I do have a couple of part finished projects that I can progress without too much more "investment".

Sunday, 4 March 2012

First Look: 1812 - The Invasion of Canada

In my search for a light, family friendly entry board wargame, recently picked up a copy of 1812: The Invasion of Canada from Academy Games.  Perhaps somewhat unsurprisingly the game is based around the US invasion of Canada in 1812.

This is a relatively recent release and having read some early reviews it looked like a good candidate to introduce certain wargame-phobic members of the family to a game themed around a historic conflict (I have had mixed success in this area previously with Shogun (the Queen Games version), Friedrich and Wars of the Roses).

1812 is an area control game which can be played with between 2 and 5 players.  It is essentially a team game with the US regulars and US militia facing up against the British regulars, Canadian militia and Native Americans.  The units are represented by wooden cubes and each faction has their own deck of movement and special cards which drive the game.

The board is a map of the US/Canadian border, the former in blue and the latter red, with each broken into the various regions.  The objective of the game is to capture the key areas on the opponent's side of the board.
Turn order is randomly determined by drawing from a bag.  Movement is governed by the cards and combat through special dice for each faction.  The faces of the dice are printed with either a target (a hit), a running man (meaning the unit flees) or a blank (a command decision - allowing withdrawal to a friendly region).  The faction dice differ to reflect the nature of the forces, for example the British regular dice have no running men.

During a turn a player musters new troops, recovers troops which have fled from previous combats, plays a movement card and, if they wish up to two special cards, fights any ensuing combats and then refills their hand.  The movement cards show how many units can be moved and how far either by land or by water (across the lakes).  The special cards provide various advantages, based on history and differ from faction to faction.

As you can see the basic mechanisms are very straightforward.  The challenge is in the decisions which have to be made which are different for each side.  The British muster their regular units at Montreal on the East side of the board but have a number of key regions in the centre whilst the US have their muster locations more evenly distributed but have farther to go to reach the border.

The game comes with three scenarios, the short introductory one and full 1812 and 1813 campaigns.  I have only played the introductory scenario so far but I am really keen to try the full blown campaigns.