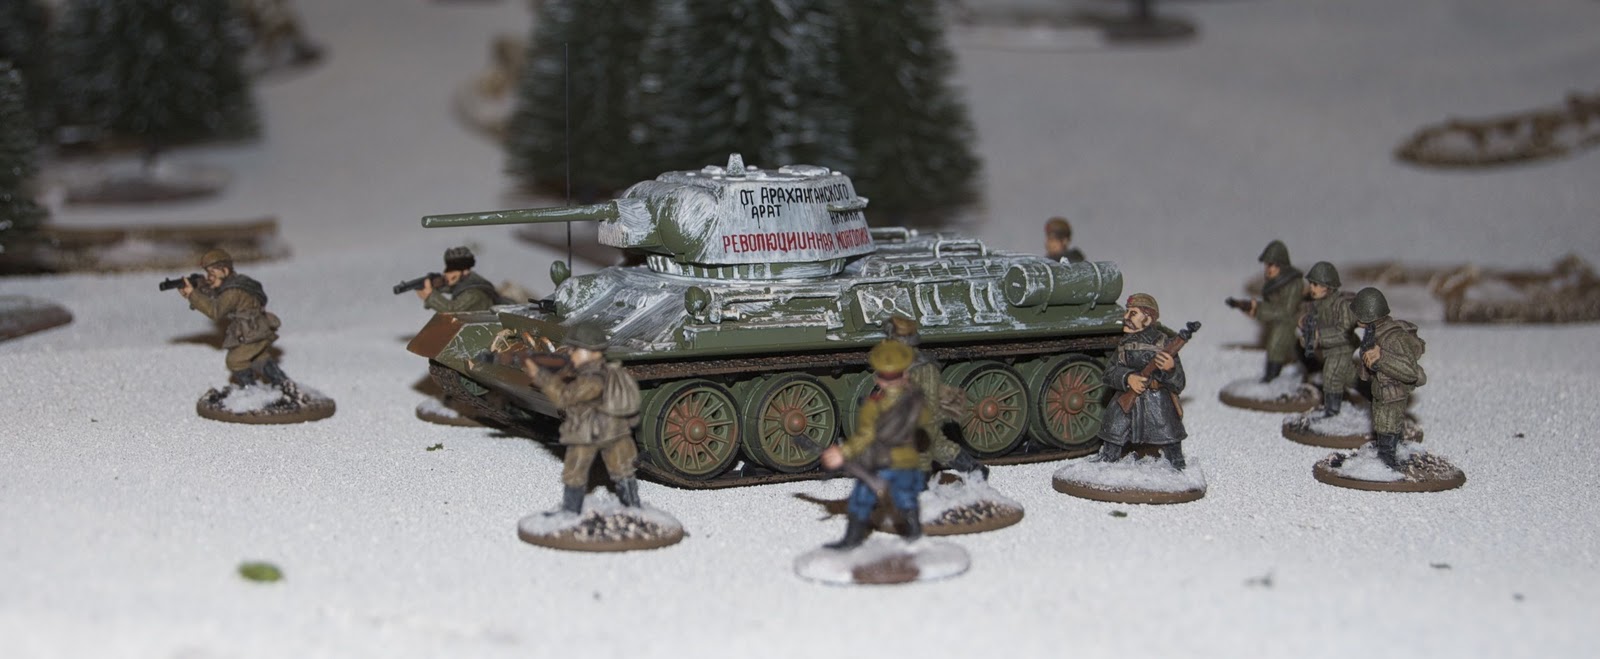
For our first game using the extended table we chose a scenario from the Too Fat Lardies' 2010 Summer Special which used their Through the Mud & the Blood rules for the Back of Beyond. This was a chance for Lenin to get some of his extensive collection of Copplestone Castings figures out again.
Somewhere in Mongolia, January 1921, Baron Stengern von Underberg (do see what they did there?) leads an attack on Kahke Bator to free Chaka Khan, the Tibetan Lama of dance from the clutches of the Chinese warlord, Wang Chung.
With a mixed force of Mongolians, White Russians, Chinese and German mercenaries along with his occasional bouts of madness the Baron had his work cut out. Wang Chung had just taken delivery of some machine guns to reinforce his Chinese troops.
The Baron split his force, sending his second in command, Major Smirnoff, with the best troops to pin down the town's defenders whilst he moved attack from the North with his Mongol cavalry and his somewhat less reliable troops.
Things began well with Smirnoff engaging one of the machine guns and gradually whittling them down whilst the Baron conducted his flanking manoeuver.
With the first machine gun taken care of Smirnoff moved towards the second but Wang Chung had sent a unit to reinforce the machine gun's position (too late as it turned out) which then began to engage the Baron. The Baron's troops soon put paid to the Chinese reinforcements and the Baron sent his own Chinese troops to occupy the building. Meanwhile he thought he had spotted a damned Bolshevik amongst the Russian unit and promptly dealt with him. Shortly afterward he spotted a good omen and ordered an advance on another occupied building.
Unfortunately the building was occupied by heavily armed Dare to Die troops and bloody hand to hand fighting ensued. The Russians were thrown back but not before inflicting some heavy casualties on Wang Chung's men.
The Baron then sent his Mongol cavalry to sweep through the centre of the town to engage the remainder of Wang Chung's troops. This was a little unwise and the cavalry swept majestically into some withering cross fire.
With Smirnoff not moving quickly enough for the Baron's liking he rode around the town to them and took command personally - sending the Major to command the Chinese troops. The Baron then eliminated the machine gun and began an assault on Wang Chung's headquarters.
The firefight took its toll on both sides but the Baron eventually prevailed and took the HQ but not before Wang Chung had made good his escape with Chaka Khan - if only the Mongol cavalry had been around to cut them off...
A place to share my thoughts on miniature wargaming, reviews of rules and miniatures, and comments on board and card games, RPGs (and anything else that takes my fancy!)
Wednesday, 8 February 2012
Tuesday, 7 February 2012
Wargames Weekend: Fittleworth's First Foray
Near Suakin, Sudan 1885
The fuzzies have been getting rather too bold of late and it was decided to give Osman Digna a damn good thrashing (six of the best, trousers down) to put him back into his place. So a column left Suakin with the aim of bringing him to task.
The main column is making camp when some fuzzies are spotted and it is decided to send a patrol in force to run them off. Captain "Boko" Fittleworth (Lenin) is given command. Most of the units from the column were able to spare a platoon so the patrol is made up of around two companies of mixed troops. Boko's old chum Captain "Stilton" Cheesewright (me) was sent along to be second in command. The patrol's objective was to clear the area to the west of the column, engaging and driving off any enemy forces they might encounter.
Boko decided to split the patrol into two with Stilton taking the KRRC and Highland detachments up onto the high ground ahead. Taking the cavalry, RMLI and infantry Boko circled around the high ground following an old camel path. Stilton found the going rather tough as the ground was pretty rough on the way to the ridge. This meant he was somewhat delayed. He had a little fright when it looked like the high ground was already occupied by the enemy but fortunately it was just one of the scouts being a little jumpy. Boko also had a false alarm in the scrub ahead but then as they rounded the end of the ridge they spotted a very large body of fuzzy-wuzzies. With the British troops desperately trying to deploy from the column into firing lines, the fuzzies began to advance.
As the RMLI were nearest to the enemy, they took the brunt of the first attack with two units of Beja charging them. With iron discipline the Marines held their fire until the optimum moment and loosed a devastating volley. But it wasn't enough and the Beja crashed into the British line. A fierce melee began and the fuzzies' numbers began to tell.
On the hill Stilton had finally reached the summit and come to the attention of the enemy. A unit of Jehadia infantry, with rifles taken from previous Egyptian expeditions, and some straggling Beja. A few volleys saw off the Beja but the remainder of the patrol was in some trouble.
With the RMLI hard pressed the Hussars were the next to receive a Beja charge. Of course they counter-charged and a terrible hand to hand fighting ensued. Meanwhile the Marines cracked under the pressure and the fuzzy-wuzzies broke through to the next infantry line. Despite successful volleys and some hard fighting the overwhelming Beja numbers began to tell and Boko's part of the patrol was swept away.
Stilton had turned his units to move to help Boko but realised it was too late and began to withdraw. Unable to simply march away from the advancing hordes he organised his troops into a firing line and began falling back in good order. Volley after volley thinned the enemy numbers but sporadic rifle fire and fanatical charges took their toll; however, in the end the Beja tide broke and Stilton was able to withdraw with his few remaining men.
The fuzzies have been getting rather too bold of late and it was decided to give Osman Digna a damn good thrashing (six of the best, trousers down) to put him back into his place. So a column left Suakin with the aim of bringing him to task.
The main column is making camp when some fuzzies are spotted and it is decided to send a patrol in force to run them off. Captain "Boko" Fittleworth (Lenin) is given command. Most of the units from the column were able to spare a platoon so the patrol is made up of around two companies of mixed troops. Boko's old chum Captain "Stilton" Cheesewright (me) was sent along to be second in command. The patrol's objective was to clear the area to the west of the column, engaging and driving off any enemy forces they might encounter.
Boko decided to split the patrol into two with Stilton taking the KRRC and Highland detachments up onto the high ground ahead. Taking the cavalry, RMLI and infantry Boko circled around the high ground following an old camel path. Stilton found the going rather tough as the ground was pretty rough on the way to the ridge. This meant he was somewhat delayed. He had a little fright when it looked like the high ground was already occupied by the enemy but fortunately it was just one of the scouts being a little jumpy. Boko also had a false alarm in the scrub ahead but then as they rounded the end of the ridge they spotted a very large body of fuzzy-wuzzies. With the British troops desperately trying to deploy from the column into firing lines, the fuzzies began to advance.
As the RMLI were nearest to the enemy, they took the brunt of the first attack with two units of Beja charging them. With iron discipline the Marines held their fire until the optimum moment and loosed a devastating volley. But it wasn't enough and the Beja crashed into the British line. A fierce melee began and the fuzzies' numbers began to tell.
On the hill Stilton had finally reached the summit and come to the attention of the enemy. A unit of Jehadia infantry, with rifles taken from previous Egyptian expeditions, and some straggling Beja. A few volleys saw off the Beja but the remainder of the patrol was in some trouble.
With the RMLI hard pressed the Hussars were the next to receive a Beja charge. Of course they counter-charged and a terrible hand to hand fighting ensued. Meanwhile the Marines cracked under the pressure and the fuzzy-wuzzies broke through to the next infantry line. Despite successful volleys and some hard fighting the overwhelming Beja numbers began to tell and Boko's part of the patrol was swept away.
Stilton had turned his units to move to help Boko but realised it was too late and began to withdraw. Unable to simply march away from the advancing hordes he organised his troops into a firing line and began falling back in good order. Volley after volley thinned the enemy numbers but sporadic rifle fire and fanatical charges took their toll; however, in the end the Beja tide broke and Stilton was able to withdraw with his few remaining men.
Wargames weekend: SF Mash Up
We started off our second day with a trial of the S&G Skirmish Games system in a strangely familiar science fiction universe. With inspiration coming from various SF series including Farscape, Firefly, Red Dwarf, Terminator and ST:TNG, it's Blakes 7, but not as we know it!
Professor Dyson, the renowned robotics engineer has been off the grid for many years. Both the Federation and the Resistance have been seeking him. Both sides have recently had good intel that android parts have been being shipped through a certain space port and so go to investigate.
Federation Commissioner Sneer sends Space Major Perkins (who lost one eye and an arm to the Resistance) and some Federation troopers. Whilst the Resistance is ably represented by a renegade Federation Officer, Aeyrn Moon, a grey skinned con artist called Chianti and Crouton, an overly obsequious robot butler.
Things begin to go badly for the Resistance almost immediately when Crouton opens a shipping container and releases a Parrot Dog, a barely trainable carnivore from the Sirius system, which some idiot has been illegally transporting. Whilst Crouton and Chianti are trying to deal with the Parrot Dog, Officer Moon starts a firefight with the Federation Troopers. As things develop Chianti gets caught between the Parrot Dog and the Federation troopers and is badly wounded. Meanwhile Crouton slips away and, rather unwisely, opens another shipping container which, unfortunately contains another three Parrot Dogs!
Officer Moon manages to eliminate the first Parrot Dog and escape the Federation Troopers whilst Crouton is running for his metal life away from the other three Parrot Dogs. With Space Major Perkins happy to sit back and let the Resistance deal with the Parrot Dog problem, Moon and Crouton have their work cut out for them.
With the carnivores dispatched, the Space Major and his troopers decided to move in. In danger of being cornered and captured Moon and Crouton transported back up to their ship (but not after having planted a transponder on the Federation ship).
Perkins found sufficient information at the spaceport to lead him to a desert planet. He contacted Commissioner Sneer who joined him there. The Resistance followed at a safe distance, formed a landing party from Officer Moon, Crouton, their perky female engineer Kylie and Pretty Boy Jim, their pilot, and transported down out of sight.
With both parties moving towards the only structure in the area, a ruin, an encounter what inevitable. Almost immediately a firefight broke out with each side using parts of the ruins as cover. The Federation troopers were coming off worse this time but Crouton was up to his old tricks and looking around. Suddenly he stumbled upon a metal object in the sand. On closer inspection it turned out to be a heavily armed and rather hostile android!
With things starting to look sticky, Commission Sneer decided to withdraw (planning to give the Resistance a taste of their own tracker medicine), leaving the others to deal with the robotic guard. Crouton once again managed to slip away and it was left to Jim to have showdown with the android - one which he one! The Resistance then located more clues to the whereabouts of Professor Dyson.
To be continued...
Professor Dyson, the renowned robotics engineer has been off the grid for many years. Both the Federation and the Resistance have been seeking him. Both sides have recently had good intel that android parts have been being shipped through a certain space port and so go to investigate.
Federation Commissioner Sneer sends Space Major Perkins (who lost one eye and an arm to the Resistance) and some Federation troopers. Whilst the Resistance is ably represented by a renegade Federation Officer, Aeyrn Moon, a grey skinned con artist called Chianti and Crouton, an overly obsequious robot butler.
Things begin to go badly for the Resistance almost immediately when Crouton opens a shipping container and releases a Parrot Dog, a barely trainable carnivore from the Sirius system, which some idiot has been illegally transporting. Whilst Crouton and Chianti are trying to deal with the Parrot Dog, Officer Moon starts a firefight with the Federation Troopers. As things develop Chianti gets caught between the Parrot Dog and the Federation troopers and is badly wounded. Meanwhile Crouton slips away and, rather unwisely, opens another shipping container which, unfortunately contains another three Parrot Dogs!
Officer Moon manages to eliminate the first Parrot Dog and escape the Federation Troopers whilst Crouton is running for his metal life away from the other three Parrot Dogs. With Space Major Perkins happy to sit back and let the Resistance deal with the Parrot Dog problem, Moon and Crouton have their work cut out for them.
With the carnivores dispatched, the Space Major and his troopers decided to move in. In danger of being cornered and captured Moon and Crouton transported back up to their ship (but not after having planted a transponder on the Federation ship).
Perkins found sufficient information at the spaceport to lead him to a desert planet. He contacted Commissioner Sneer who joined him there. The Resistance followed at a safe distance, formed a landing party from Officer Moon, Crouton, their perky female engineer Kylie and Pretty Boy Jim, their pilot, and transported down out of sight.
With both parties moving towards the only structure in the area, a ruin, an encounter what inevitable. Almost immediately a firefight broke out with each side using parts of the ruins as cover. The Federation troopers were coming off worse this time but Crouton was up to his old tricks and looking around. Suddenly he stumbled upon a metal object in the sand. On closer inspection it turned out to be a heavily armed and rather hostile android!
With things starting to look sticky, Commission Sneer decided to withdraw (planning to give the Resistance a taste of their own tracker medicine), leaving the others to deal with the robotic guard. Crouton once again managed to slip away and it was left to Jim to have showdown with the android - one which he one! The Resistance then located more clues to the whereabouts of Professor Dyson.
To be continued...
Monday, 6 February 2012
Wargames Weekend: Tomorrow's War
Our second game of the weekend was a first outing for Osprey and Ambush Alley's Tomorrow's War rules (TW). This gave us both a chance to dust off some Denizen and GZG 25mm SF figures and see how TW differs from Force on Force.
The backstory was that a planet was trying to break away from the Galactic Empire and Imperial troops had been sent to make them change their minds. I took command of the Rebels, who were defending part of one of their space ports with Lenin commanding the Imperial troops. My troops were armed and armoured pretty conventionally whilst Lenin had power armoured troopers with Chameleon camouflage.
The Imperial troops advanced through the light wood towards the perimeter of the landing area and one of their squads spotted a squad of Rebel troops scanning the area from an emplacement. The Imperials immediately opened fire and the Rebels, taken by surprise, were decimated; however, the firing not only alerted another Rebel squad but also gave them a target to aim for. A couple of the Imperials went down to the Rebel heavy weapons and the Imperials ceased fire to avoid giving themselves away. This on and off fire fight continued until the Rebels brought up their reserve squad and concentrated their fire which forced the Imperials to fall back.
On the other flank the second Imperial squad wasn't fairing much better. Their initial attack had less impact and so a similar firefight began with the Rebels eventually getting the upper hand.
With the remaining Imperial troops withdrawing the day went to the Rebels.
Once we got back into the swing of things the rules played out reasonably well. Of course our first issue was working through actions, interruptions and reactions between a set of troops in Chameleon suits with advanced sensors and some hidden opposition!
The key thing we did learn was that we needed more space with 25mm figures (we were only playing on a 6x4' table. Next time we'll be trying it on my new, larger 8x6' table (or if either of us decide to start a new project - doing it in 15mm!)
The backstory was that a planet was trying to break away from the Galactic Empire and Imperial troops had been sent to make them change their minds. I took command of the Rebels, who were defending part of one of their space ports with Lenin commanding the Imperial troops. My troops were armed and armoured pretty conventionally whilst Lenin had power armoured troopers with Chameleon camouflage.
The Imperial troops advanced through the light wood towards the perimeter of the landing area and one of their squads spotted a squad of Rebel troops scanning the area from an emplacement. The Imperials immediately opened fire and the Rebels, taken by surprise, were decimated; however, the firing not only alerted another Rebel squad but also gave them a target to aim for. A couple of the Imperials went down to the Rebel heavy weapons and the Imperials ceased fire to avoid giving themselves away. This on and off fire fight continued until the Rebels brought up their reserve squad and concentrated their fire which forced the Imperials to fall back.
On the other flank the second Imperial squad wasn't fairing much better. Their initial attack had less impact and so a similar firefight began with the Rebels eventually getting the upper hand.
With the remaining Imperial troops withdrawing the day went to the Rebels.
Once we got back into the swing of things the rules played out reasonably well. Of course our first issue was working through actions, interruptions and reactions between a set of troops in Chameleon suits with advanced sensors and some hidden opposition!
The key thing we did learn was that we needed more space with 25mm figures (we were only playing on a 6x4' table. Next time we'll be trying it on my new, larger 8x6' table (or if either of us decide to start a new project - doing it in 15mm!)
Wargames Weekend: The Mussy-la-Ville Road
Once again we managed to arrange another slot for Lenin to visit for the weekend. This time we added an additional day in order to get a couple more games in.
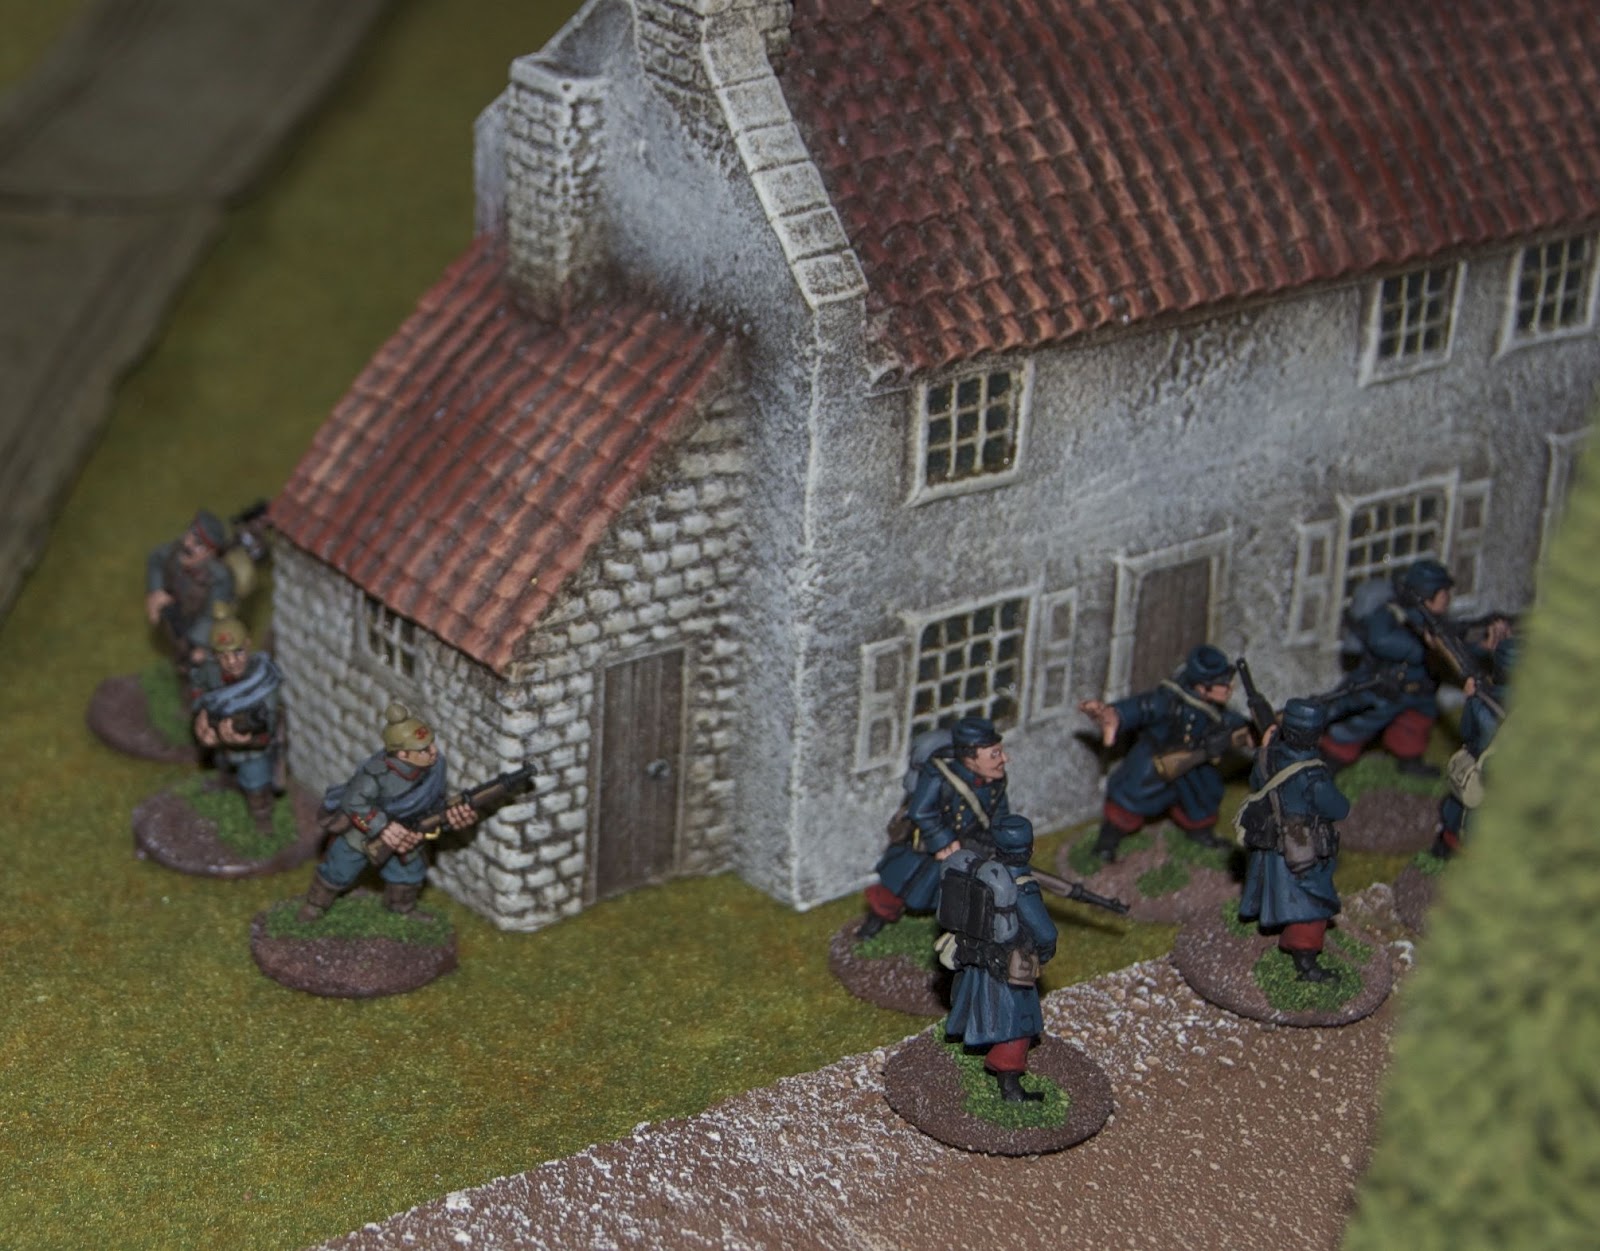
Our first was a return to our occasional WW1 campaign from Rommel's Route to Verdun, the Skirmish Campaigns booklet, with Lenin taking the part of Rommel. This time it was the Mussy-la-Ville Road scenario, which is based on a brief reference by Rommel in his book, Infantry Attacks. The action took place on the Outskirts of Bleid on 22 August 1914 at 0715 hours.
After advancing west from Hill 325, Lt. Rommel stopped his platoon in cover in a field and took a scouting group ahead. Making use of cover and the foggy conditions, they passed one farm and found their way close to the Mussy-la-Ville road. As the scouting team approached they spotted a couple of French squads relaxing along the road. Rommel decided to attack rather than wait to bring up the rest of his platoon.
Rommel slowly advanced through the fog, just catching snippets of conversation from the French troops ahead. He and his men worked their way up between the path and a field to a convenient hedge-line. At this point he split his men. One group was to work their way along the hedge-line towards the road whilst Rommel took the others up past the barn in the direction of the houses.
The barn turned out to be unoccupied and so Rommel calmly advanced to the rear of the first house. At this point the other German group spotted some French troops up ahead, standing around smoking and talking, and decided to open fire. One French soldier sent down straight away and the others were taken aback. Meanwhile Rommel used the confusion to rush around the other side of the house and surprise the French.
Two more French soldiers were hit in the hail of fire from Rommel's men and a couple more decided to take to their heels. With the remainder confused and being shot at from both sides Rommel charged into them. The fight was over quickly with the last French soldier being taken prisoner. But another French section appeared out of the fog to Rommel's rear; however, he simply turned his men and opened fire once again putting paid to that threat. Having only lost a single man in the encounter Rommel took his prisoner and returned to his unit.
With the variable attachments available in the Skirmish Campaigns system (which aids re-playability), Lenin began the game with three more men than Rommel actually had on the day. That said he was still significantly outnumbered by the French and only had the fog and the element of surprise to help him balance things out. In the end he did slightly better than Rommel did historically.
Our first was a return to our occasional WW1 campaign from Rommel's Route to Verdun, the Skirmish Campaigns booklet, with Lenin taking the part of Rommel. This time it was the Mussy-la-Ville Road scenario, which is based on a brief reference by Rommel in his book, Infantry Attacks. The action took place on the Outskirts of Bleid on 22 August 1914 at 0715 hours.
After advancing west from Hill 325, Lt. Rommel stopped his platoon in cover in a field and took a scouting group ahead. Making use of cover and the foggy conditions, they passed one farm and found their way close to the Mussy-la-Ville road. As the scouting team approached they spotted a couple of French squads relaxing along the road. Rommel decided to attack rather than wait to bring up the rest of his platoon.
Rommel slowly advanced through the fog, just catching snippets of conversation from the French troops ahead. He and his men worked their way up between the path and a field to a convenient hedge-line. At this point he split his men. One group was to work their way along the hedge-line towards the road whilst Rommel took the others up past the barn in the direction of the houses.
The barn turned out to be unoccupied and so Rommel calmly advanced to the rear of the first house. At this point the other German group spotted some French troops up ahead, standing around smoking and talking, and decided to open fire. One French soldier sent down straight away and the others were taken aback. Meanwhile Rommel used the confusion to rush around the other side of the house and surprise the French.
Two more French soldiers were hit in the hail of fire from Rommel's men and a couple more decided to take to their heels. With the remainder confused and being shot at from both sides Rommel charged into them. The fight was over quickly with the last French soldier being taken prisoner. But another French section appeared out of the fog to Rommel's rear; however, he simply turned his men and opened fire once again putting paid to that threat. Having only lost a single man in the encounter Rommel took his prisoner and returned to his unit.
With the variable attachments available in the Skirmish Campaigns system (which aids re-playability), Lenin began the game with three more men than Rommel actually had on the day. That said he was still significantly outnumbered by the French and only had the fog and the element of surprise to help him balance things out. In the end he did slightly better than Rommel did historically.
Sunday, 22 January 2012
The Mutiny: 79th Highlanders
Here is a photo of my latest addition to my Indian Mutiny collection which I just finished basing this morning (a little later than scheduled). Once again the figures are from Mutineer Miniatures:
Sunday, 8 January 2012
The Mutiny: Sikhs
The next unit for my Indian Mutiny project is some loyal Sikhs - once again these are from Mutineer Miniatures.
Next up will be some highlanders (as soon as they are finished!)
Thursday, 5 January 2012
Plans for 2012
With the New Year in full swing I thought it would be worth outlining my plans for 2012 - if for no other reason than to be able to look back at the end of the year and wonder what the hell I was thinking!
2011 saw quite a bit of progress on a couple of my major projects which creates some space to consider some new ones; however, the house move along with the current economic climate will necessitate a greater level of restraint this year, unfortunately.
28mm Mahdist War - with the last elements of this first phase (the Suakin Campaign) of this project well underway, I can start to think about the second phase - Khartoum. I already have some of the forces I need and so I will probably pick up some bazingers, baggara horse and a few more Nile arabs. Then there's the walls...
28mm Indian Mutiny - I am currently tidying and packing up the last of the figures for this stage (Mutineer light infantry and cavalry, artillery for both sides, some personalities and some civilians) ready to go for painting. I am likely to pause at this point and put my focus elsewhere now.
28mm WW3 - the Mongrel Soviets for this are part based - I just need to persuade Lenin to do some more BAOR to match my existing figures and this will be ready to go.
28mm Early War Polish - having managed to get a core of the Bolt Action figures at a discount from North Star, I am planning to pick up a few more infantry to make up a platoon and a couple of TK tankettes. Them I will need some German light armour to add to my existing early war German infantry. These are likely to find their way onto my Salute shopping list.
15mm Marlburian - these figures have taken a bit of a back seat with the focus on the Sudan, the Mutiny and WW2 last year so I am planning to dust them off and work out which units I want to have painted up. I will also be getting one of my reference books off the shelf to provide some inspiration.
28mm Montrose - these are ready for basing (and, to tell the truth, have been for some time) and so I am planning to get them done in the next couple of months - I just need to settle on a set of rules!
25mm French Revolution - the only thing holding the basing of these back is making a decision on the ground terrain (i.e. what colour). I need to bite the bullet here!
28mm RCW/WW1 Eastern Front - I am hanging back on these as I haven't been inspired to progress this project (although that could change any moment!) - I just need some Copplestone Bolsheviks and Musketeer figures in greatcoats to move this along.
I think that's it for "in progress" work. As to possible new projects, there are a few candidates running through my mind at the moment but I can't possibly do more than one of these this year I don't think and probably not until late in the year:
28mm Modern Afghanistan
28mm Maori Wars
28mm Carlist Wars
But, since no plan survives contact with reality, who knows how things may actually turn out!
2011 saw quite a bit of progress on a couple of my major projects which creates some space to consider some new ones; however, the house move along with the current economic climate will necessitate a greater level of restraint this year, unfortunately.
28mm Mahdist War - with the last elements of this first phase (the Suakin Campaign) of this project well underway, I can start to think about the second phase - Khartoum. I already have some of the forces I need and so I will probably pick up some bazingers, baggara horse and a few more Nile arabs. Then there's the walls...
28mm Indian Mutiny - I am currently tidying and packing up the last of the figures for this stage (Mutineer light infantry and cavalry, artillery for both sides, some personalities and some civilians) ready to go for painting. I am likely to pause at this point and put my focus elsewhere now.
28mm WW3 - the Mongrel Soviets for this are part based - I just need to persuade Lenin to do some more BAOR to match my existing figures and this will be ready to go.
28mm Early War Polish - having managed to get a core of the Bolt Action figures at a discount from North Star, I am planning to pick up a few more infantry to make up a platoon and a couple of TK tankettes. Them I will need some German light armour to add to my existing early war German infantry. These are likely to find their way onto my Salute shopping list.
15mm Marlburian - these figures have taken a bit of a back seat with the focus on the Sudan, the Mutiny and WW2 last year so I am planning to dust them off and work out which units I want to have painted up. I will also be getting one of my reference books off the shelf to provide some inspiration.
28mm Montrose - these are ready for basing (and, to tell the truth, have been for some time) and so I am planning to get them done in the next couple of months - I just need to settle on a set of rules!
25mm French Revolution - the only thing holding the basing of these back is making a decision on the ground terrain (i.e. what colour). I need to bite the bullet here!
28mm RCW/WW1 Eastern Front - I am hanging back on these as I haven't been inspired to progress this project (although that could change any moment!) - I just need some Copplestone Bolsheviks and Musketeer figures in greatcoats to move this along.
I think that's it for "in progress" work. As to possible new projects, there are a few candidates running through my mind at the moment but I can't possibly do more than one of these this year I don't think and probably not until late in the year:
28mm Modern Afghanistan
28mm Maori Wars
28mm Carlist Wars
But, since no plan survives contact with reality, who knows how things may actually turn out!
Monday, 2 January 2012
Thursday, 29 December 2011
U-Boat Leader
I was lucky enough to receive a few games this Christmas, amongst these was my first solo boardgame from Dan Verssen Games - U-Boat Leader. Having long been fascinated by WW2 submarine warfare and Das Boot this was an excellent choice.
The game includes four campaigns covering different stages of the Battle of the Atlantic:
- The Battle Begins: covering operations at the start of World War II to about mid-1940.
- The Happy Time: covering the period from mid-1940 to mid-1941 when the U-boats and wolfpacks dominated the seas.
- Operation Drumbeat: covering operations off the American coast and in the Caribbean in early 1942.
- The Hunted: covering the time period when the tide starts to turn against the U-boats in mid 1942.
- Type IIB/C coastal submarines
- Type VII A/B/C Atlantic submarines
- Type IX A/B/C long-range submarines
- Type XXI Elektro-boat
Each of which can be selected from (or developed through) various experience levels (Green, Trained, Veteran and Ace).
The game is split between the campaign map, where you direct several U-Boats:
and the Tactical Display where the actual combat occurs:
Each campaign provides you with a pool of Special Option points which you can spend on your U-Boat flotilla and other special missions and actions. Movement across the campaign map triggers events (which can include contacts) and when the U-Boat reaches its patrol area it can check for contacts. If a contact is made then things transfer to the Tactical Display with the target vessels represented by generic counters until they are identified (which is managed through a card deck) - sometimes revealing some nasty surprises!
A U-Boat can try to form a Wolfpack by contacting other boats in the same patrol area but with the chance of alerting the target. The combat consists of relative movement, detection and combat phases with the U-Boat finally having to exit the display - which can be tricky if you have been detected.
I have only played the game once so far but really enjoyed the experience. I am sure this is not a game for everyone but I will be breaking this out plenty more times in the future.
Friday, 23 December 2011
Merry Christmas!
Here's wishing you a very merry Christmas! Thank you to all of you who have stopped by and a particularly big thank you to those who have taken the time to leave comments (thus proving I am not just talking to myself!). I hope that you're on the nice list and Santa (or the Hogfather) brings you lots of gaming goodness this Christmas (Hogswatch)!
Lardies Xmas Special - Out Now!
After a little longer a wait than normal (but it looks like it was worth it!) the TooFatLardies have released their Christmas special.
The price has gone up slightly to £6 but with the pdf weighing in at 122 pages I think it's still pretty good value if you are into Lardies games. The run down this year is:
Quite a packed issue as usual and certainly worth a look!
The price has gone up slightly to £6 but with the pdf weighing in at 122 pages I think it's still pretty good value if you are into Lardies games. The run down this year is:
- The sinking of the Konigsberg - A scenario for Bag the Hun
- On Patrol- A complete pre-game patrol system for I Ain’t Been Shot Mum
- A Brief Affair - An Australian attack on a German held Pacific Island in 1914 with Through the Mud and the Blood
- An A to Z of Umpiring - The dos and don’ts of running games
- One off Battles for Le Feu Sacre - Some pick up Napoleonics games
- Green Hill Moonshine - A scenario for Terrible Sharp Sword ACW rules
- Deadly Pairs - A Bag the Hun scenario for Normandy 1944.
- Passchendaele, The Bitter Victory - Sidney Roundwood looks at this epic battle and how it shaped the face of warfare
- In the Salient - Three Scenarios for gaming Passchendaele
- 6mm LOVES IABSM - Why 6mm is the perfect scale for IABSM?
- Across the Nemen - A Barbarossa scenario
- Messing Around with Boats - Rating ships for Kiss Me Hardy
- Operation Charnwood - The background to this remarkably little gamed operation to capture Caen
- A Fresh and Highly Trained Instrument - A complete Operation Charnwood mini-campaign for I Ain’t Been Shot Mum
- The Capture of Akhalkalak Fortress - A scenario for Sharp Practice set on the borders of Russia and the Ottoman Empire
- Sniper! - Some alternative sniper rules for IABSM
- Bridge over the River Urk - A Partisan scenario for IABSM
- The Roundwood Report - An interview with Richard Clarke on the future for TooFatLardies
- Get Fondler - A gritty Sharp Practice scenario set in Gateshead?
- May Madness - A scenario for Bag the Hun above the Dunkirk perimeter in 1940
Tuesday, 20 December 2011
Extending the Gaming Table - Part 2
I managed to get the second part of the extension completed this afternoon. After yesterday's experience I made sure I wore an extra pair of socks when working the garage as it was pretty cold again. This part of the table doubles as my workbench and so I will now be able to get back to my basing with better lighting.
Next up I need to unpack and sort the remaining boxes from the move as I now have somewhere to put the stuff! Of course if I am lucky next weekend I may have more things to have to think about storing!
The main challenge will be coming up with a managable labelling system so I can actually find things when I need them.
Monday, 19 December 2011
Extending the Gaming Table
Today I have mostly been designing and building an additional 2 foot section for my gaming table. I have only completed the first of the two sections and am now feeling rather old as I'm completely knackered now!
The reason it's a little more complicated than the main table is this part needs to perform double duty - as a workbench and a storage unit. This allows me to keep some spare space in the games room when I don't need thr larger table - plus it allows me to put the workspace in the window alcove so I can get some proper daylight when I am working.
The design is basic and functional rather than pretty (largely due to my complete lack of woodworking skills - I did German at school instead - not much use when making basic furniture!). But once it's all finished I can finally get the last boxes unpacked and the games room organised.
Saturday, 17 December 2011
Eastern Front Action
In keeping with the season I thought I would post a few photos from a WW2 Eastern Front game I put on recently:
John and the Buttocks of Buddha
I managed to get down to the club again last week and had an interesting game of Italian Wars using Impetus. I had some cavalry, mounted crossbow and some arquebusiers and my orders were to hold the left flank whilst Crazy Dave punched through on the right and rolled up their flank. It sounded like a good plan until Ben arrived and took command of the troops in the village right in Dave's way. Needless to say the attack got somewhat bogged down and, whilst I whittled away at the troops over the river, my cavalry took plenty of casualties and when the enemy reinforcements arrived things took a turn for the worse. It was at this point that John revealed that he has the buttocks of a god ...
... unfortunately they're Buddha's ...
no idea when he's going to let him have them back!
... unfortunately they're Buddha's ...
no idea when he's going to let him have them back!
Sunday, 4 December 2011
Sunday, 27 November 2011
Mahdist War: KRRC
Here are some more of my 28mm Perry Sudan figures - this time from the 3rd Battalion of the King's Royal Rifle Corps - for the Suakin Campaign:
Tuesday, 22 November 2011
Quick Project Update
What with the house move and a rather nasty surprise from HMRC I have had to revisit my project plans and do a little trimming and rescheduling. So here's a quick overview:
Indian Mutiny: With the Sikhs and Highlanders currently away for painting I am just sorting out the next batch of figures. These are some Mutineer cavalry, light infantry, artillery for both sides and the civilians and personalities from Mutineer miniatures. I suspect I will close this project after these have been done and I have found an appropriate source for some suitable flags.
Sudan: SELWG saw me purchase some more figures for my Sudan project. These represent the last I need to complete Phase 1 - the Suakin campaign - including the Yorks & Lancs, Black Watch, 10th Hussars and some Naval Brigade. I may get the additional figures I need for Phase 2 - Khartoum - at Salute next year.
WW2 NW Europe: I just need to base up my Foundry Paras and this can be counted as complete (always assuming any wargaming project ever reaches that stage!).
Cold War: Lenin has my additional BAOR and the additional Soviets I need are off with Roger so it is just down to me to assemble and paint the BTR (and possibly get a couple more vehicles - I've always fancied a Scorpion - but that will have to wait a while unfortunately).
Falklands: No real progress on this one since the last update - although it would be nice to have this progressed given next year is (believe it or not) the 30th anniversary.
Russian Civil War/WW1 Eastern Front: I keep get the figures out and then popping them back on the shelf as I don't have any desperate need to move this project along (which is handy as I'm not sure I can afford it with the other ones planned!).
Montrose: Still being rebased (or if you really want to know the truth - about to start being rebased - i.e. I haven't actually done anything yet...)
Scarlet Pimpernel: I still need to decide on what finish I am going to do on the bases for these and then assemble and paint the guillotine.
Marlburian: These are next on the list for cleaning up; however, I still need decide which units I want them to be and which rules to use in order to get this moving along.
Maximilian in Mexico: No actual progress here.
Vietnam: Lenin tells me these are on the workbench - so I am hoping to get a game to the table in the new year.
Greek Myth: This is still a bit on the back burner; however, the new figures from Foundry are rather nice ... (must resist!)
WW2 Polish: This was one project I had intended to reschedule but with North Star having some of the Bolt Action Poles on sale (and the sale coming to an end) I thought I'd better secure the saving! Not much of an excuse but I will be popping them on the shelf as I will need to supplement them with some figures that North Star didn't have on offer.
Everything Else: is being delayed/rescheduled as there is plenty to be getting on with without starting something new (always assuming I can get treatment for the "ooohhh shiny" syndrome I seem to have contracted!
Sunday, 20 November 2011
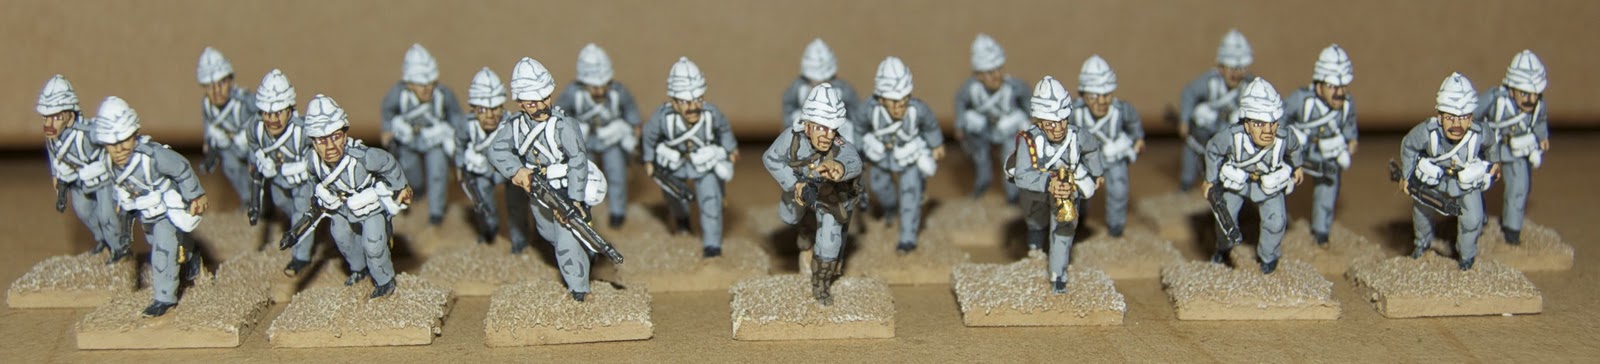
Mahdist War: 19th Hussars
I didn't get much time this weekend to devote to gaming stuff but did manage to base up a few more of my Perry Sudan figures. This time it's the 19th Hussars:
Friday, 18 November 2011
First Look: Cold War Gone Hot
Hot on the heels of Ambush Valley comes the fourth source book for Force on Force but the first covering an conflict that never actually happened.
Unlike Ambush Valley, Cold War Gone Hot is focussed more on scenarios. In its case there are 22 of them. They are split into three groupings, Col War Fears, Cold War Realities and Cold War Fantasies to suit the approach you wish to take to this alternative history.
Cold War Fears is based on the views held at the time (irrespective of whether these were based on fact rather than speculation). So you get a Soviet and Warsaw Pact with significantly superior numbers of forces and worryingly similar capabilities to the West.
Cold War Realities is based in the real world following the release of hard facts after the fall of the Berlin Wall and the break up of the Soviet bloc. The scenarios in this section also focus on a somewhat more aggressive NATO in order to spice things up.
Cold War Fantasies is based more in the world of Holywood than the real one, taking its inspiration from films and fiction set in the period.
The balance of the 120 odd page book contains special rules, unit and vehicle information etc. It is a useful reference work if you are interested in a counter factual conflict in the 1980s that's for sure.
Currently at Amazon for only £9.71: Cold War Gone Hot: World War II 1986 (Force on Force)
Unlike Ambush Valley, Cold War Gone Hot is focussed more on scenarios. In its case there are 22 of them. They are split into three groupings, Col War Fears, Cold War Realities and Cold War Fantasies to suit the approach you wish to take to this alternative history.
Cold War Fears is based on the views held at the time (irrespective of whether these were based on fact rather than speculation). So you get a Soviet and Warsaw Pact with significantly superior numbers of forces and worryingly similar capabilities to the West.
Cold War Realities is based in the real world following the release of hard facts after the fall of the Berlin Wall and the break up of the Soviet bloc. The scenarios in this section also focus on a somewhat more aggressive NATO in order to spice things up.
Cold War Fantasies is based more in the world of Holywood than the real one, taking its inspiration from films and fiction set in the period.
The balance of the 120 odd page book contains special rules, unit and vehicle information etc. It is a useful reference work if you are interested in a counter factual conflict in the 1980s that's for sure.
Currently at Amazon for only £9.71: Cold War Gone Hot: World War II 1986 (Force on Force)
First Look: Ambush Valley
Ambush Valley is the third source book for the Force on Force rules and covers the Vietnam War. The book is over 180 pages packed with useful information on a wide variety of units which were involved in the conflict.
There are around 20 pages of the book taken up with new or modified rules for Force on Force (including special rules for civilians and for boats) but the remainder of the book is full of data which aren't FoF specific.
This is a great resource for anyone interested in information on the forces involved in Vietnam and given the volume of data is great value. It is much lighter on scenarios though, with only six being included, and so is more useful as a reference work rather than for game ideas.
Available from Amazon for only £9.71: Ambush Valley: Vietnam 1965-1975 (Force on Force)
There are around 20 pages of the book taken up with new or modified rules for Force on Force (including special rules for civilians and for boats) but the remainder of the book is full of data which aren't FoF specific.
This is a great resource for anyone interested in information on the forces involved in Vietnam and given the volume of data is great value. It is much lighter on scenarios though, with only six being included, and so is more useful as a reference work rather than for game ideas.
Available from Amazon for only £9.71: Ambush Valley: Vietnam 1965-1975 (Force on Force)
Friday, 11 November 2011
Lest we forget
Photo courtesy of dougbelshaw
They went with songs to the battle, they were young.
Straight of limb, true of eyes, steady and aglow.
They were staunch to the end against odds uncounted,
They fell with their faces to the foe.
They shall grow not old, as we that are left grow old:
Age shall not weary them, nor the years condemn.
At the going down of the sun and in the morning,
We will remember them.
Saturday, 5 November 2011
First Look: I Ain't Been Shot Mum III
I never thought it would happen but the Too Fat Lardies have actually produced a full colour professionally bound rule book! It's the new (3rd) edition of their I Ain't Been Shot Mum company size WW2 rules in fact. So I felt compelled to buy it.
The rules are now beautifully presented in over 100 pages interspersed with diagrams, examples and some nice photos. But what else has changed?
If you weren't familiar with the previous edition of the rules, you can find my overview here.
The core rules are pretty much unchanged but with lots of improvement in layout, explanation and the introduction of some concepts from some of the other Lardies rules (e.g. Command Initiative). Some of the terminology has been improved - particularly "wounds" (which was confusing) which have become shock. The main change for infantry has been with the Big Men who are no longer rated by dice but rather with a Command Initiative rating. This is supplemented by Command Initiative cards within the deck which may only be used by Big Men of that rating or above. The rating and the cards provide a number of actions that the Big Man may perform, activating a unit for example. The rating also determines the Big Man's command radius.
The armour rules have been overhauled too which was a rather weak area for the previous edition and the concept of "Aces" has been introduced to allow for those really exceptional individuals who crop up in various accounts.
There are six generic and four historical scenarios included along with a "handbook" section covering the organisation of forces for Normandy. This shows the model the Lardies will be using as they update their theatre specific supplements for the new edition. Fortunately the changes aren't substantial so the old supplements can still be used with some easy tweaks (as outlined in the Lard Island News blog).
In addition to the new rules the Lardies have also produced an official printed set of cards to use with them. There are 104 cards, which are larger than normal playing cards, which allow you to field two companies of infantry, five platoons of armour and eight Big Men per side along with three off-table support units and all the bonus characteristic cards you will need.
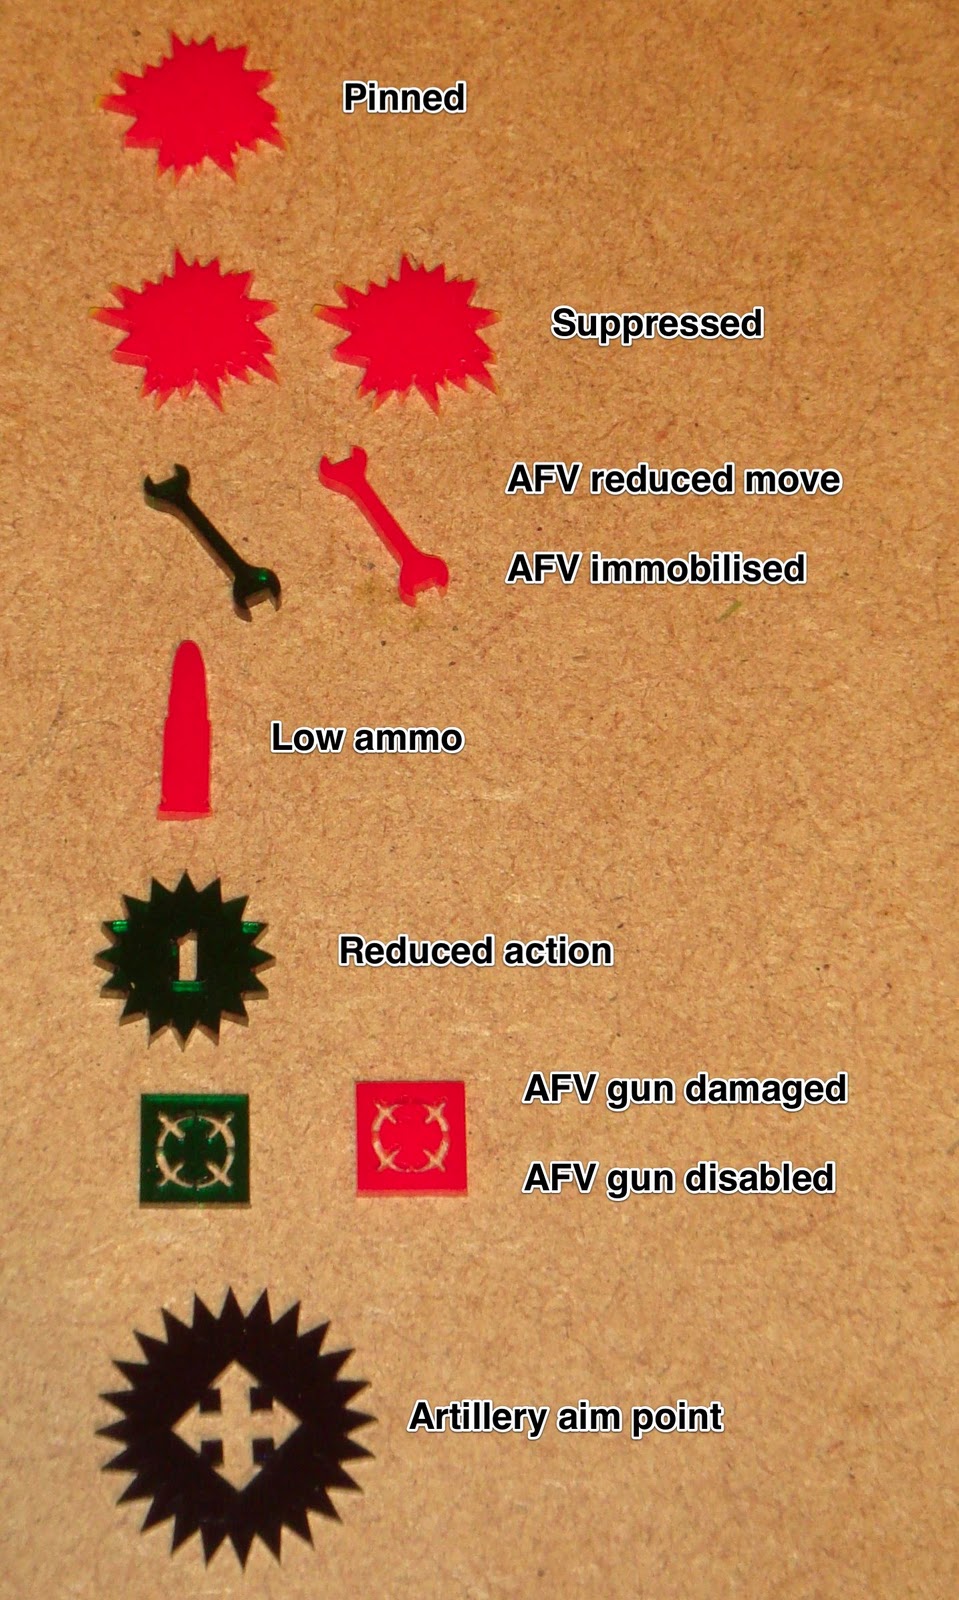
There is also an official set of tokens to accompany the rules which include low ammo, artillery aiming point, pinned/suppressed, reduced actions, AFV reduced movement, AFV immobilised, AFV main gun damaged and AFV main gun disabled markers as you can see below:
The rules are available in softback, pdf or tablet enabled pdf and also in bundles with the cards and tokens.
I am glad I bought them as I have now got my 15mm WW2 figures out of the boxes and am starting to plan a game with them!
The rules are now beautifully presented in over 100 pages interspersed with diagrams, examples and some nice photos. But what else has changed?
If you weren't familiar with the previous edition of the rules, you can find my overview here.
The core rules are pretty much unchanged but with lots of improvement in layout, explanation and the introduction of some concepts from some of the other Lardies rules (e.g. Command Initiative). Some of the terminology has been improved - particularly "wounds" (which was confusing) which have become shock. The main change for infantry has been with the Big Men who are no longer rated by dice but rather with a Command Initiative rating. This is supplemented by Command Initiative cards within the deck which may only be used by Big Men of that rating or above. The rating and the cards provide a number of actions that the Big Man may perform, activating a unit for example. The rating also determines the Big Man's command radius.
The armour rules have been overhauled too which was a rather weak area for the previous edition and the concept of "Aces" has been introduced to allow for those really exceptional individuals who crop up in various accounts.
There are six generic and four historical scenarios included along with a "handbook" section covering the organisation of forces for Normandy. This shows the model the Lardies will be using as they update their theatre specific supplements for the new edition. Fortunately the changes aren't substantial so the old supplements can still be used with some easy tweaks (as outlined in the Lard Island News blog).
In addition to the new rules the Lardies have also produced an official printed set of cards to use with them. There are 104 cards, which are larger than normal playing cards, which allow you to field two companies of infantry, five platoons of armour and eight Big Men per side along with three off-table support units and all the bonus characteristic cards you will need.
There is also an official set of tokens to accompany the rules which include low ammo, artillery aiming point, pinned/suppressed, reduced actions, AFV reduced movement, AFV immobilised, AFV main gun damaged and AFV main gun disabled markers as you can see below:
The rules are available in softback, pdf or tablet enabled pdf and also in bundles with the cards and tokens.
I am glad I bought them as I have now got my 15mm WW2 figures out of the boxes and am starting to plan a game with them!
First Look: Tomorrow's War
Having enjoyed reading Force on Force (FoF) and been in search of a set of rules suitable for my collection of 25mm Denizen and GZG figures I decided to take the plunge and picked up a copy of Tomorrow's War (TW) - the science fiction rules based on FoF.
TW is presented in a very similar way to FoF but at 260 pages is even thicker. The rules are clearly based on FoF but provide a series of additional concepts to allow to deal with different technology levels, robots and the like. As with FoF the rules concentrate on the capability of the troops rather than the individual weapon types.
It is clear that these rules are intended to be used for hard science fiction rather than science fantasy with little provision for alien races and the like (although there is some guidance as to how you might add them). Which suits me as hard SF is my preference.
In addition to the rules themselves, which are organised in almost exactly the same way as FoF, provides a backstory with a mix of Nation states and major Corporations vying for control of various colonies and resources.
Having recently played FoF and enjoyed them I am really looking forward to getting TW to the table.
TW is presented in a very similar way to FoF but at 260 pages is even thicker. The rules are clearly based on FoF but provide a series of additional concepts to allow to deal with different technology levels, robots and the like. As with FoF the rules concentrate on the capability of the troops rather than the individual weapon types.
It is clear that these rules are intended to be used for hard science fiction rather than science fantasy with little provision for alien races and the like (although there is some guidance as to how you might add them). Which suits me as hard SF is my preference.
In addition to the rules themselves, which are organised in almost exactly the same way as FoF, provides a backstory with a mix of Nation states and major Corporations vying for control of various colonies and resources.
Having recently played FoF and enjoyed them I am really looking forward to getting TW to the table.
First Play: Force on Force
Our final tabletop miniatures game of the week was a chance to get the new edition of Force on Force to the table along with my Mongrel Soviets and Afghans. I decided to try a asymmetric engagement as I thought this suited the forces better so we still need to try a kinetic game in order to properly try the rules out.
The scenario was adapted from one kindly published by [insert] (the adaptations were largely due to the fact I didn't have the vehicles). Lenin, as Soviet commander, was required to identify, isolate and neutralise the Mujahideen forces in the compounds.
The basic concepts behind the rules are fairly straight forward; however, the way they have decided to cover all the aspects in each section of the rule book makes them a little daunting at first. We weren't phased by the reaction based approach as we are both very familiar with the Two Hour Wargames rules which use a similar approach.
The scenario did not start well for the Soviets. Their first fire team advanced cautiously from behind a field of crops into sight of a group of Mujahideen concealed within one of the compounds. This resulted in my group opening fire and causing enough casualties to effectively eliminate the Soviet fire team. The other half of the Soviet squad then advanced to try and extract the casualties and a similar thing happened. This rather gave us pause as, if this was going to be repeated each time the Soviets came into sight there was no way for them to get a team onto overwatch and hence be able to make any headway at all. In fact I had rolled rather well for all the tests and firing rolls on both occasions (which happens some times despite my reputation!) so we decided to reset the game and try it again.
The second time I rolled somewhat more normal dice which gave the Soviets the chance to fire first and get a team into position. This completely changed the situation and we both breathed a sigh of relief that it was simple chance and not any failure of the rules themselves (although it is something to bear in mind with small groups vs large ones when designing scenarios!).
With the Soviet left flank engaged they also began to advance on the right.
When they came into sight of the main compound another fire fight broke out, with the Soviets getting the drop on the Afghans again.
With things going well for the Soviets some Afghan reinforcements arrived. This gave the Soviets pause but didn't prevent them from rushing and taking the first compound on the left flank. The Afghans now concentrated in the larger central compound. The Soviets brought up some reinforcements for an assault.
The Soviet launched their attack and quickly secured a foothold in the buildings on the edge of the compound. A firefight broke out between the Afghans reinforcements and the Soviet ones but the Soviets quickly got the upper hand.
Even with more reinforcements arriving directly in the compound, the Soviets, now in position, make quick work of them and secured the entire compound.
The game was a lot of fun and so we will be giving the rules some outings in order to test the other aspects of them, particularly the kinetic (regular vs regular) engagements.
The scenario was adapted from one kindly published by [insert] (the adaptations were largely due to the fact I didn't have the vehicles). Lenin, as Soviet commander, was required to identify, isolate and neutralise the Mujahideen forces in the compounds.
The basic concepts behind the rules are fairly straight forward; however, the way they have decided to cover all the aspects in each section of the rule book makes them a little daunting at first. We weren't phased by the reaction based approach as we are both very familiar with the Two Hour Wargames rules which use a similar approach.
The scenario did not start well for the Soviets. Their first fire team advanced cautiously from behind a field of crops into sight of a group of Mujahideen concealed within one of the compounds. This resulted in my group opening fire and causing enough casualties to effectively eliminate the Soviet fire team. The other half of the Soviet squad then advanced to try and extract the casualties and a similar thing happened. This rather gave us pause as, if this was going to be repeated each time the Soviets came into sight there was no way for them to get a team onto overwatch and hence be able to make any headway at all. In fact I had rolled rather well for all the tests and firing rolls on both occasions (which happens some times despite my reputation!) so we decided to reset the game and try it again.
The second time I rolled somewhat more normal dice which gave the Soviets the chance to fire first and get a team into position. This completely changed the situation and we both breathed a sigh of relief that it was simple chance and not any failure of the rules themselves (although it is something to bear in mind with small groups vs large ones when designing scenarios!).
With the Soviet left flank engaged they also began to advance on the right.
When they came into sight of the main compound another fire fight broke out, with the Soviets getting the drop on the Afghans again.
With things going well for the Soviets some Afghan reinforcements arrived. This gave the Soviets pause but didn't prevent them from rushing and taking the first compound on the left flank. The Afghans now concentrated in the larger central compound. The Soviets brought up some reinforcements for an assault.
The Soviet launched their attack and quickly secured a foothold in the buildings on the edge of the compound. A firefight broke out between the Afghans reinforcements and the Soviet ones but the Soviets quickly got the upper hand.
Even with more reinforcements arriving directly in the compound, the Soviets, now in position, make quick work of them and secured the entire compound.
The game was a lot of fun and so we will be giving the rules some outings in order to test the other aspects of them, particularly the kinetic (regular vs regular) engagements.
Wargames Week: Up the Arsenal
Next up was a first outing for my Indian Mutiny figures from Mutineer Miniatures. For easy I decided to use the supplement and scenario for Sharp Practice from the Too Fat Lardies 2008 Christmas Special. The scenario adopts the usual Lardies Carry On style humour (as you can probably tell from the title) with Lenin playing the part of the ubiquitous Flashman and me as the Mutineer leader Ram Dittin. Flashman's mission was simply to raid the old arsenal and bring back much needed ammunition and supplies all under the noses of the Mutineers!
Flashman decided to split their forces with Lieutenants Jarce and St James leading the assault on the arsenal whilst he protected their rear. The attack didn't start too well with the allegedly stealthy Sepoy sent to take care of the gate house guard altered him instead. The British decided to try rushing the gate before the Mutineers reacted. This went rather better with the British quickly taking the yard and stables.
Unfortunately for Flashy the rear of the arsenal wasn't quite as safe as he was hoping as some Badmashes from the bazaar heard the firing and began rushing to reinforce the arsenal.
Flashman formed his men into a firing line and let loose a volley into the advancing Mutineers which gave them a little pause; however, another unit appeared on their right flank.
Meanwhile the arsenal garrison had eventually organised themselves and counter attacked. After some fierce and bloody fighting the tables were turned on the British and Lieutenant St James was forced to make a last stand against the arsenal wall where they paid the ultimate price.
Arriving too late to save St James, Lieutenant Jarce led his furious men in a vicious assault which put paid to the Mutineer garrison. With the arsenal secured, Jarce organised his men to load mules from the stables with supplies.
Behind the arsenal Flashman ordered a few more volleys and then had his men fall back in good order. Some Mutineers who slipped past Flashman managed to run to the front of the arsenal where they came under murderous fire from the remaining unit of the Madras Fusiliers and made a hasty retreat.
With the flanks covered the British made a organised withdrawal with the necessary supplies.
Flashman decided to split their forces with Lieutenants Jarce and St James leading the assault on the arsenal whilst he protected their rear. The attack didn't start too well with the allegedly stealthy Sepoy sent to take care of the gate house guard altered him instead. The British decided to try rushing the gate before the Mutineers reacted. This went rather better with the British quickly taking the yard and stables.
Unfortunately for Flashy the rear of the arsenal wasn't quite as safe as he was hoping as some Badmashes from the bazaar heard the firing and began rushing to reinforce the arsenal.
Flashman formed his men into a firing line and let loose a volley into the advancing Mutineers which gave them a little pause; however, another unit appeared on their right flank.
Meanwhile the arsenal garrison had eventually organised themselves and counter attacked. After some fierce and bloody fighting the tables were turned on the British and Lieutenant St James was forced to make a last stand against the arsenal wall where they paid the ultimate price.
Arriving too late to save St James, Lieutenant Jarce led his furious men in a vicious assault which put paid to the Mutineer garrison. With the arsenal secured, Jarce organised his men to load mules from the stables with supplies.
Behind the arsenal Flashman ordered a few more volleys and then had his men fall back in good order. Some Mutineers who slipped past Flashman managed to run to the front of the arsenal where they came under murderous fire from the remaining unit of the Madras Fusiliers and made a hasty retreat.
With the flanks covered the British made a organised withdrawal with the necessary supplies.
Subscribe to:
Posts (Atom)