Sunday, 26 January 2014

Lebanon 1982

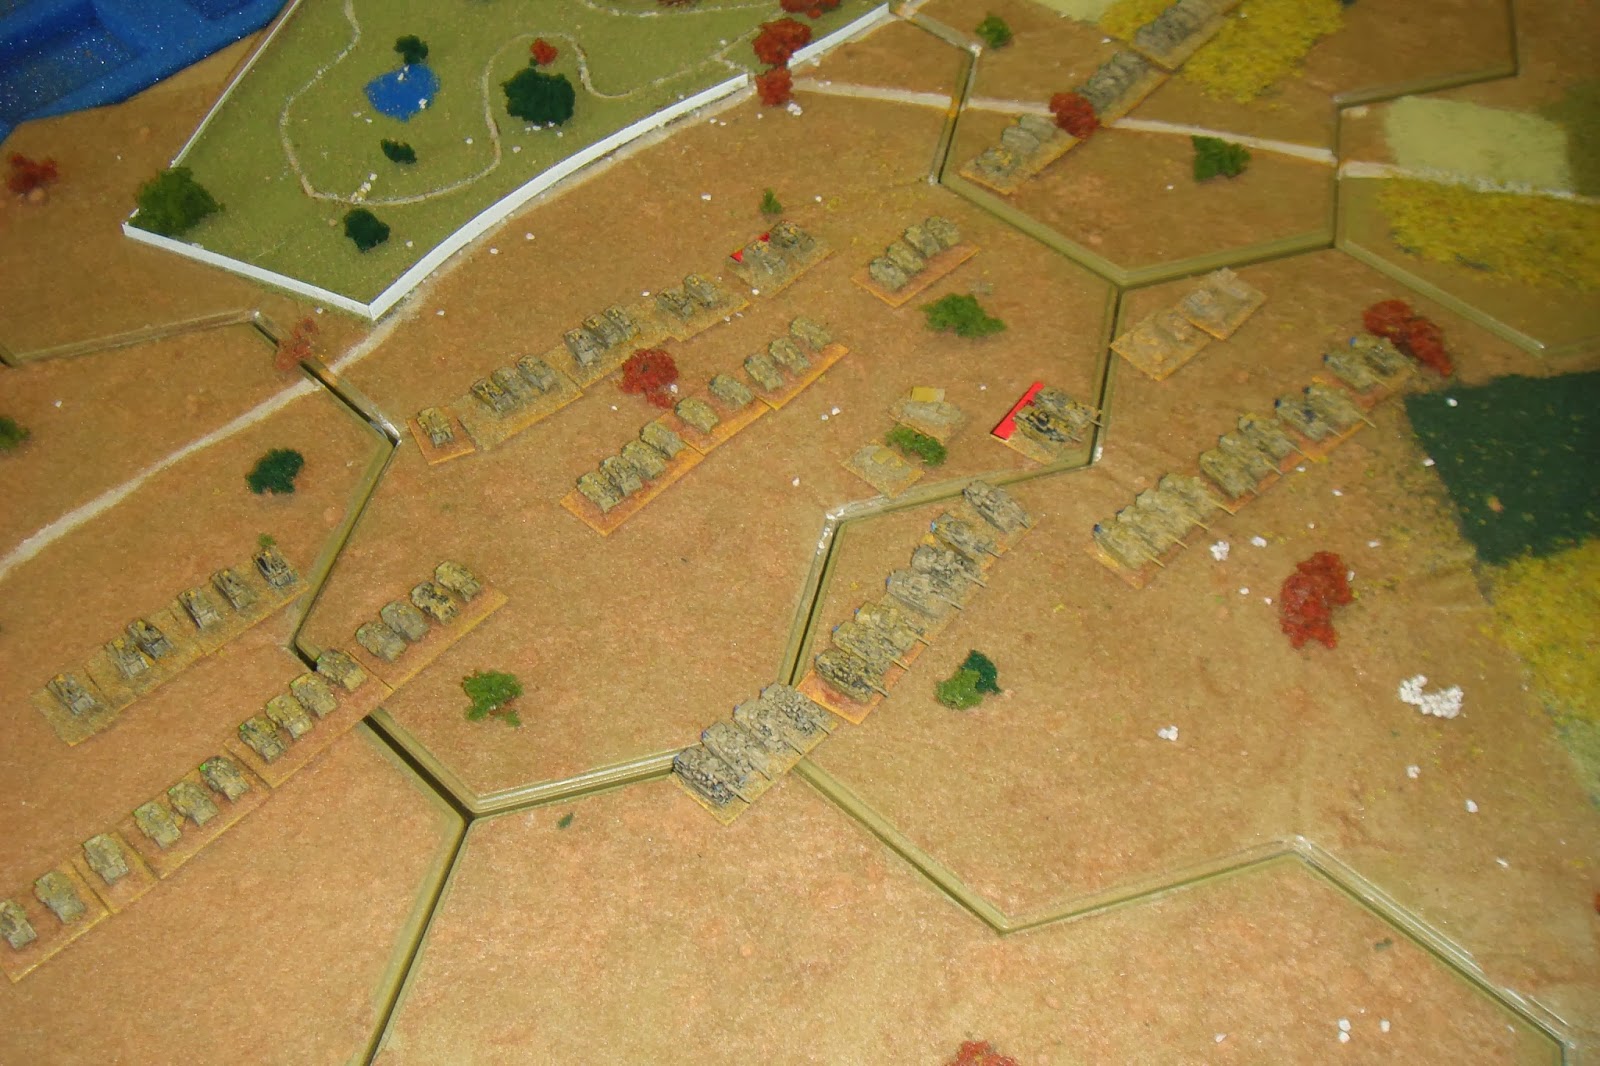
I managed to get along to the club yesterday and was lucky enough to get to play a 3mm moderns game set in the Lebanon in 1982.  The scenario consisted of the Israeli forces advancing across their border in order to eliminate insurgents operating from settlements in Lebanon and running into Syrian forces.


I initially took command of three platoons of Israeli special forces and eventually ended up commanding both the armour and mechanised forces on our right flank facing off against the advancing Syrians.


With two armoured units and one mechanised unit our plan was to advance the armour up the left and right flanks either side of the settlements as it was much better territory for armour.  Our advance forces including the special forces platoons were initially deployed to secure the closest settlements with the mechanised unit available to support in the case of serious resistance.


Whilst we did meet some opposition we managed to overcome it with our advanced units (eventually) and so that allowed the mechanised unit to be deployed on my flank in order to advance up to the most distance settlement on the table.  However, by this stage a pretty substantial Syrian force was rushing towards us!  The Syrians outnumbered us in armour by about 3 to 1 but their force was a mix of T72s and T62 whilst ours was wholly Centurions.  Unfortunately for Colin who was commanding our left wing he ended up facing the entire compliment of Syrian T72 plus their artillery and so had to withdraw after taking (and giving I should add!) some serious casualties.  On my flank the river held up the Syrian forces and we eventually engaged in the final settlement after some Christian Militia had given their first armoured platoon a but of a pasting (they advanced into the urban area without infantry support and learnt rather rapidly why that's not advisable!).  We got quite a few turns completed but didn't have quite enough time to fight the game to a conclusion though.

Here are a few more photos from the game:


Saturday, 25 January 2014

Polish Command

Obviously I need someone to lead my Polish infantry - here's the officer, radioman, medic and anti-tank rifleman:


Friday, 24 January 2014

WSS: Régiment du Dauphin

The next addition to the War of the Spanish Succession project is another French unit - this time the Régiment du Dauphin.  This regiment fought at both the Battle of Blenheim and the Battle of Oudenarde:


Once again, these are Black Hat figures with a Warflag flag.

Thursday, 23 January 2014

WSS: Régiment de Champagne

The next addition to my War of the Spanish Succession collection is a French regiment - the Régiment de Champagne.  This unit seems to be able to trace its roots back as far as the 1550s but for our purposes it fought as part of the Marquis de Bligny's brigade in Oberglau during the Battle of Blenheim:


The figures are Black Hat and the flag is from Warflag.

Wednesday, 22 January 2014

First Look: Regimental Fire & Fury Scenarios Vol. 1 1861-1862

Having enjoyed paying the Brigade level Fire and Fury rules I picked up a copy of the Regimental level version.  With this now tried on the tabletop I thought it would be worth "investing" in a copy of the scenario booklet for the Regimental rules.  I have both of the equivalents for the Brigade level rules and thought they were well put together and have played a few games from them.

The book is sub-titled "Volume 1: 1861-1862" which both indicates more to come (?) and the period it covers.  It is paperback in colour, in letter format and runs to around 80 pages.  It starts off with a brief foreword and introduction followed by some new "optional rules" covering Skirmishers, changes to Extended Line Frontages, Twilight & Night Turns, Change Front manoeuvres, Plunging Fire through Wooded High Ground and Massed Artillery Fire.

The book covers 11 engagements (some with multiple associated scenarios) from various battles or smaller encounters.  Although when I say small it must be said that none of these scenarios can be considered "small" in the sense of the number of troops required.


  • Battle of Big Bethel, June 10 1861
  • First Battle of Bull Run, July 21 1861 - Henry House Hill
  • Battle of Belmont, November 7 1861
  • Battle of Pea Ridge, March 7, 1862 - (2 scenarios - Leetown and Elkhorn Tavern)
  • First Battle of Kernstown, March 23, 1862
  • Battle of Port Republic, June 9, 1862
  • Second Battle of Bull Run, August 28, 1862 - Brawner Farm
  • Battle of Antietam, September 17, 1862 - The Cornfield
  • Battle of Iuka, September 19, 1862
  • Battle of Perryville, October 8, 1862  - (3 scenarios - Polk's Right Wing Attack, Hardee's Left Wing Attack and the Full Battle)
  • Battle of Prairie Grove, December 7, 1862 - (3 scenarios - Herron Assaults The Ridge, Blunt To The Rescue and the Full Battle)

Each scenario follows a similar format with an introduction providing the historical background, a description of the scenario itself, then moving onto the terrain.  This is followed by an Order of Battle in both a summary table and diagrammatic format (which can be copied to provide the labels for the units) along with any specific arrival timing or other restrictions.  The game length, victory conditions and any special scenario rules are then set out.  This is all accompanied by a scenario map.

I had hoped that this would provide me with some useful scenarios to get me going with the rules; however, I found that despite having what I considered a reasonably sized collection (about 100 stands per side) I didn't actually have enough troops or enough of the right troops for any of the scenarios.  Of course you can choose to rescale or adapt the scenarios to fit your own requirements but this does rather reduce the benefit of having pre-made ones.  I guess I will just have to buy more troops!

As with the previous Brigade level scenario booklets this one is well presented but whether you consider it represents good value will depend on looking carefully at the content.

Tuesday, 21 January 2014

WSS: Lord North and Grey's Regiment of Foot

The next unit completed for this phase of my War of the Spanish Succession project is another English one.  This time the North and Grey's Regiment which saw action at the Battles of the Schellenberg, Blenheim, Ramillies, Oudenarde and Malplaquet:


The figures are 15mm from Black Hat and the flag is from Warflag.

Monday, 20 January 2014

WSS: Queen Dowager's Regiment of Foot

I have been slowly progressing the second phase of my War of the Spanish Succession project and have just finished another English regiment to add to my collection.  This one represents the Queen Dowager's Regiment of Foot which only saw action in the Low Countries early in the war, in particular serving in the defence of the fortress of Tongres in Flanders after which it was awarded the title “Royal”, and mottoes “Pristinae Virtutis Memor” and “Vel Exuviae Triumphant”.  It then saw more action in Spain.


The figures are 15mm from Black Hat and the flag is from Warflag.

Sunday, 19 January 2014

Polish HMG

Here's a couple of pictures of the machine gun unit that gave the Germans such a hard time in the Defiant Stand, Poland 1939 scenario (but this time not concealed in a building!):


Once again the figures are from the Warlord Games Bolt Action range

Saturday, 18 January 2014

Polish Infantry

Since they didn't make much of a physical appearance in my earlier Defiant Stand, Poland 1939 post I thought I would show you a couple of pictures of some of my Polish infantry (they are from Warlord Games' Bolt Action range):


Friday, 17 January 2014

First Look: Strike of the Eagle

I was lucky enough to get a copy of Strike of the Eagle from Academy Games for Christmas.  Strike of the Eagle is a block wargame covering the Polish Soviet War and is the first (and at present only) game in the Fog of War series from Academy Games.

I was interested in getting this particular game for a couple of reasons.  I am interested in the Polish Soviet War itself, the game has a different take on the usual block game mechanisms and it is capable of accommodating more than 2 players.

The board represents the part of Poland, Soviet Russia, the Ukraine and the disputed land between them.  It is divided into two fronts, effectively separated by the Pripet Marshes, which mean that in the full game the units on each front can be split between players allowing up to 4 people to play.  Movement is point to point and the board shows the various towns and cities of the area and the road and rail links between them.

Whilst this is a block game with the usual fog of war that brings it adds some interesting new dynamics through the use of cards and orders.  Each side has a deck of cards and can use these for one of four different things:
  1. Increasing the number of orders which can be issued (the default is two)
  2. Generating reinforcements
  3. Modifying combat
  4. A historical event 
This provides some serious choices and decisions as you normally only a hand of 6 cards at the beginning of each turn and their are five operations phases when they can be used within each turn.

The orders are represented by thick card counters which are placed either on individual locations and units.  You have to place one recon order each turn which allows you to see the enemy blocks where it is placed and whilst this can be used to bluff the enemy it does mean that you only get one further order each phase unless you play a card to increase it.  The other orders are movement to or from a location (infantry one space, cavalry two spaces), forced marches (as movement but a further space), withdraw (if attacked), defend, reorganise (regain a single strength point) or rail transport (move up to 4 blocks up to 8 spaces along rail lines).


Initiative is tracked separately on each front and this allows the player with initiative to determine the order in which orders are placed and, within the order sequence, who reveals and executes their orders first (which can be critical as blocks can be pinned in place by advancing blocks).

Each block represents between 1,500 and 8,000 men as represented by its individual strength point value (and as you would expect adjusted by rotating the block) which is then combined with various modifiers and the value from a card to determine how many strength points are lost by the other side making the combat diceless.

Supply lines are important too and can have a serious impact if units end up out of supply.  There are also leader blocks which have other effects.

The game comes with 9 scenarios (I have only played the first - the introductory scenario - shown above) which provides for plenty of replay-ability.

The game is beautifully produced, has a good amount of historical information included and provides some really challenging decisions - I am looking forward to getting it to the table again.

If you want to know a little more here's a video review of the game from Marco Arnaudo:

Thursday, 16 January 2014

Defiant Stand, Poland 1939

Our next and final miniatures game was a chance to play with some of the 28mm Polish figures I have been basing using the Nuts! rules from Two Hour Wargames.

I used another of the Skirmish Campaigns scenarios - this time from their Poland 1939 booklet - although I changed the Poles from the Black Brigade to standard infantry (since I don't have any suitable figures for the Black Brigade - though these are now available from Gorgon Studios in the US).

Lenin took command of the Poles and I took the invading German forces.  The scenario has the German forces motorised (motorcycle combinations and trucks) but given the final terrain layout the vehicles became rather redundant after the first turn!


My first motorcycle team advanced up the road towards the crossroads but as they approached the ford they came under fire from the nearby buildings and pulled off the road.  With clear enemy activity I decided to move my trucks off the road and deploy my troops in the woods.


As I came to the edge of the woods my troops came under rifle and machine gun fire from both the houses by the crossroads and the barn.


In decided to try to get my MG teams deployed to provide covering fire to enable an assault across the open ground.  Whilst it was easy to suppress the rifle fire the machine gun was a different kettle of fish.  I had multiple attempts before their MG jammed and I was able to get a team into position; however, when the Poles cleared the jam I didn't fare too well in the subsequent fire fight.  We also had to contend with sniper fire!


After taking quite a few casualties I managed to deploy my mortar team to lay down some smoke and advanced towards the barn under the cover of that and one of my remaining MGs.


Things were going relatively well until we came under fire from an LMG in the barn and most of my men decided to withdraw to the woods.


The NCOs carried on and managed to reach the barn and throw grenades through the openings which dealt with the men inside.  Whilst I had secured one of the three buildings (my victory conditions were two) I had suffered serious casualties, particularly of my NCOs and as a result was not able to press home my attack.

My only frustration with the game (other than the minor one of not actually getting my vehicles far onto the table) was that my new Poles spent almost all their time in the buildings and so weren't very visible. As a result they don't feature in most of the photos of the game.  I will be posting some more pictures of them when I have finished basing up the remaining few.

Tuesday, 14 January 2014

Crete, 1941

Our second game of 2014 was another chance to play the Chain of Command rules by Too Fat Lardies.  In this case Lenin converted a scenario from one of the Skirmish Campaign books on Crete.  I took command of the Fallschirmjaeger and he took the Allied forces.

As with our previous game the patrol phase was an interesting component and something I think is a great aspect of the rules.  Of course I didn't have quite enough Jump Off points (4 per side) and so a little improvisation was required.  In the end the placement of them was a little tricky but I think worked ok.

Deployment is something I think we are both still coming to terms with - as both of us were rather too keen to get as many of our toys onto the table as quickly as possible.


I split my force, with the majority being deployed on or near the hill on my left and with a single section on the right to harass the enemy.  Lenin ended up with most of his troops on the ridge on his table edge but with a section further forward in a small wood.


I deployed my MG team to cover the ridge and started to lay down fire as I continued to deploy men on my left.  This gave me a base of fire which allowed my MG armed section to advance through to some rocky cover and set up there.  My other section advanced through the vineyard towards Lenin's advance section.


Lenin attempted to suppress me using his Bren but the power of my MGs was quickly felt.  He added a substantial amount of rifle fire to it which then gave me a little more of a headache but ultimately the power of the German MGs was decisive.


With Lenin taking some serious casualties on the ridge, his Bren team being forced to withdraw and his advance section pinned in the wood we called the game.


In the post game analysis we decided that the straight conversion of the Skirmish Campaigns scenario probably didn't make things easy for Lenin and that, in future, we would probably look more closely at aligning it with the Chain of Command approach.  All in all a fun game though and we'll certainly be playing the rules again.

Monday, 13 January 2014

Lardies' Christmas Special


With everything going on around Christmas I forgot to highlight that Too Fat Lardies released their traditional seasonal special.  Tipping the scales at 167 pages it's a big one this year and includes a whole variety of Lard related stuff including:

  • Venta Icenorum - a new scenario for Dux Britanniarum involving a fort.
  • A Village In Normandy - a look at the scene of some of D-Day’s toughest fighting with the Canadian North Shore Regiment, house to house fighting techniques and two scenarios for IABSM and Chain of Command.
  • Everybody Look What’s Going Down - a scenario for Charlie Don’t Surf.
  • All at Sea - a complete campaign background for an exciting fight in the Indian Ocean with Sharp Practice and Kiss Me Hardy.
  • All Quiet on the Central Front - an advanced look at the upcoming I Ain’t Been Nuked Mum cold war rules. 
  • Modelling Continuous Exposure to Combat - the effects of combat on men and how to reflect it in games.
  • You Dirty Rat – gangster car chase rules.
  • Chain of Command Espana - an introduction to the Spanish Civil War version of Chain of Command (something the Lardies have subsequently been supplementing with unit lists on their blog).
  • The (now traditional) Roundwood Report.
  • Scenario Seven - for Chain of Command. 
  • One Gun to Rule Them All - the development and deployment of the Sherman 76mm.
  • Emerson’s Exit - scenario design for Bag the Hun and a historical refight.
  • Carros Blindados, Autoametrelladoras & Tizanos 1936 - impromptu armoured vehicles in the first year of the Spanish Civil War.
  • Playing Chain of Command with Platoon Forward.
  • Scenario Thirteen - for Quadrant 13.
  • Force Morale, Your Flexible Friend - representing different unit types and applying to IABSM.
  • Staghounds and Dynamite - an IABSM scenario in Italy.
  • Hens, Chicks and Spanish Drivers - tanks in the Spanish Civil War.
  • Random Events in Chain of Command.
  • One Dark Night. Don’t Panic! - a Home Guard scenario for Chain of Command .
  • In Flanders Fields - 1914 infantry tactics.
  • In the Last Ditch Again - a Through the Mud and the Blood scenario for the retreat from Mons.
  • Hell and Heroism - three Chain of Command scenarios set around the battle for Hannut in May 1940.

Plenty of interesting content and well worth the £6 for the pdf.

Sunday, 12 January 2014

1/300 Napoleonics

I managed to get along to the Maidstone club on Saturday for the first time in quite a while and got another chance to play in a 1/300 Napoleonic game.  I was on the  Franco Bavarian side in command of the Bavarian Division and facing the Prussians.

Having surveyed the terrain, our plan was to deploy in depth in the centre with the French in the lead, the my Bavarians followed by our French Cavalry and to use the cavalry to screen any Prussian advance on our right flank whilst the French attacked on our left.

The Prussians deployed all three of their Divisions on our right and advanced down the table using a stream to cover their right flank.  Our French Division advanced around their flank and crashed into their right hand division whilst their left hand division was focussed on trying to push our Cavalry out of the way.

I had deployed one of my Bavarian brigades and the artillery on some hills to our centre and acted as a hinge for our line whilst holding one brigade in reserve.  With the French assault making headway I added a couple of my unit to the fray but was coming under increasing pressure to my right.  After an artillery bombardment our French cavalry was thrown back by their infantry but my Bavarian cavalry stepped into the breach and continued to hold them up.

With our time running out the Prussian division on our left began to withdraw after a valiant fight but having sustained heavy casualties.  The Prussian central division decided to assault my artillery and infantry support but were thrown back decisively on my left; however, despite the artillery using canister they broke through my right.  But it wasn't enough and the day was ours.

Here are a couple of photos - apologies for the quality but I forgot my proper camera (doh!) and was left with only the rather poor one on my phone:

My Bavarians follow up the French advance

The Prussians advance

The Prussians about to move through the town

Cavalry on our right French then Bavarian

Brawner's Farm, August 1862

Lenin popped over for New Year and so we decided to give Regimental Fire and Fury its first outing.  I picked a smaller scenario from the separate scenario booklet - although I was still some figures short so some rather Mexican Adventure flavoured stands found their way onto the Confederate side until the Union had caused enough casualties for them to be replaced!

The scenario I had selected was Brawner's Farm, which covers the initial engagement on the evening of 28th August 1862 which turned into the second Battle of Bull Run.  Lenin took command of the Union forces and I took the Confederates.

The game began with the 2nd Wisconsin with Brigadier General John Gibbon holding the Broomsedge Field (the key position) for the Union supported by the 19th Indiana and 7th Wisconsin in Brawner's Woods.  They were facing my "Stonewall Brigade" under Baylor and Taliaferro along the fence line near Brawner's Farm.


The Union troops quickly consolidated their hold on the Broomsedge Field despite attacks from my Stonewall Brigade whilst my artillery and reinforcements (in the form of the 26th and 60th Georgia) advanced towards them.  The Union battery under Campbell emplaced on the overlooking knoll and Reynold's Battery (off table) caused some serious casualties to the 26th Georgia as they advanced.


Soon the 76th New York and 56th Pennsylvania arrived to support the Union lines.


The 31st and 38th Georgia arrived to reinforce my troops and I deployed the 26th and 60th Georgia along the Broomsedge Field fence line.


The Union were holding my initial attack but after a few volleys of musketry I gave a Rebel yell and advanced into the field.


We battled on into dusk.  The melee was hard fought but the Union line was thrown back out of the field (a significant penalty to their morale).


Meanwhile more Union and Confederate reinforcements had arrived on my left and began, what ultimately turned out to be a rather inconclusive exchange of fire.

I pushed on in the centre and as my assault started to outflank some of the Union troops their morale collapsed and they started to withdraw.  With night now falling the Union decided to pull back and left us in control of the ground.

---

Whilst Regimental Fire and Fury shares many of its mechanisms with the original Brigade level rules, the changes they have made to make them play somewhat differently.  I must admit to being sceptical about the revisions to the musketry approach but it's the changes to the manoeuvre mechanism which had the most profound effect in our game.  Units which are in command are likely to carry on even when worn or spent but once out of command and with penalties for losing key positions and being outflanked these have a massive impact.  Obviously I need to play the game a few more times to get the changes properly embedded in my mind (and I'm sure we have probably missed stuff this time round) but I think the revised set are certainly worth persevering with alongside the original.

Tuesday, 31 December 2013

Happy New Year!

The Night Watch - by Paul Kidby

I would like to wish you, your families and friends all the very best for the New Year!  Let's hope it's full of gaming fun!

Goodbye 2013 and Hello 2014!

With the old year on its way out and the New Year hoving into view I thought I would have a quick look back on my progress in 2013 and forward to my gaming plans for 2014.

At the start of the year I was rather cautious about declaring my projects for 2013 and only announced a single one -  Muskets & Tomahawks in 28mm.  As a result I can claim to have completed my planned projects for the year (for the first time ever)!  Of course I do have a few other things that I mentioned I might do (most of which were hang overs from previous years) and towards which I mad rather poorer progress:

28mm Mahdist War - The second phase - Khartoum - was a possible for 2013 but didn't make it past the budget review!

28mm Indian Mutiny - finishing off the figures in the painting queue and picking up some additional Gentlemen Volunteer and additional Bengal cavalry was to be part of my 2013 plans.  I did indeed pick up the additional figures but none of them have seen a brush as yet (although I do plan to get them moving in 2014).  I still haven't got around to trying out John Company yet though...

28mm Early War Polish - I am currently basing the (understrength) platoon of these but the SdKfz 221 and TKS are still in the (possibly in appropriately named) WIP box - so I am remain somewhat behind my original plan (2012) and also behind my revised plan (to get them on the table early in the first quarter of 2013).

15mm Marlburian - Not only have all of the figures for the second phase been purchased, most are painted and a goodly number are being based up at the moment.  I am a little late on this one (largely due to real life intruding - or I might have made the planned date).  I am now contemplating phase 3 (which will see Bavarians being added to the French and some more Allies) but that will depend on the budget review for next year.

28mm Montrose - Not only did I get all of the figures based I also managed to get them to the table.  I am still not entirely decided on Pike & Shotte for the rules and I suspect I may need to add some more figures.

25mm French Revolution - The only thing continuing to hold back the basing of these is making a decision on the ground terrain (i.e. what colour).  Not terribly impressive as this was my excuse two years ago!  I will be finishing them in 2014 (probably...)

28mm RCW/WW1 Eastern Front - I didn't really plan to progress this project again this year!

28mm WW2 Paras - I have picked up the further squad for the Bolt Action US Paras to make up the platoon and plan to get these off for painting in the new year.  I have also picked up a couple more Bren guns for my British Paras to bring them up to the proper Chain of Command platoon strength.

28mm WW1 Belgians - I was hoping that these would be used before the end of 2013; however they remain in the WIP box - I would really like to get them to the table in 2014 if possible though.

15mm Early WW2 - I still have quite a few more of these to base up - so that's another thing for the new year- but did manage to add a decent amount to my collection of 4Ground buildings.

28mm Dark Ages - I didn't even get started on the refresh for this one!

28mm Crusades - Deus Vult entirely failed to spark a resurgence of interest for this project and so I didn't actually do much other than set up a single game with my existing figures - only to find that I don't really have enough (which may explain why I haven't done anything more)!

As to plans for 2014 I have settled on two new projects - one large and one smaller:

15mm Wars of the Roses - I have been meaning to start a larger medieval project and, having visited Towton this year I think that was what swayed me to WotR.  I have already started to supplement my library and have decided to go with the Peter Pig range.  Now I just need to decide between the Canadian Wargamers Group Flower of Chivalry rules and A Coat of Steel rules from the Perfect Captain.

28mm Ronin - I really liked the look of the rules and also the various Buntai being produced by North Star.  And now that 4Ground have added some buildings I am struggling to resist.

I still have some other ideas, largely revolving around expanding some of my existing collection - 28mm WW2 (mainly for Chain of Command) and 15mm ACW (Fire & Fury) but all of the above will depend on how the finances look for next year (and having just received yet another bill through the post I have some concerns there!)

Sunday, 29 December 2013

Where has he been?

Unfortunately a combination of work and DIY has given me precious little time for gaming during November and December, hence the lack of posts.  Whilst work isn't likely to be any easier during January I have completed my big DIY project and the next one shouldn't be for another couple of months.

But having had some time off over Christmas I have started to get back up to speed and am currently basing up the figures for Phase 2 of my 15mm War of Spanish Succession project - so I should be able to get some of those onto the blog in the next couple of weeks.  I am planning some gaming for around New Year so there is is more content on the horizon!

Tuesday, 24 December 2013

Happy Hogswatch!

My compliments of the season to you all!  Thank you for stopping by, apologies for my absence of late and here's hoping you get some gaming goodness under the Christmas tree!

Sunday, 3 November 2013

First Look: Regimental Fire and Fury

With the original (Brigade level) Fire and Fury rules one of my favourite sets of rules and now, sadly, no longer available I decided to take a look at their Regimental little brother.

Regimental Fire and Fury comes as a 96 page full colour hardback book and are set out in a two column format interspersed with photographs, diagrams and tables.  The format will be instantly familiar to anyone who has seen the original Fire and Fury.

The rules were written for 15mm figures but are easily converted for larger or smaller figures.  Units are made up on several, multi-figure, stands with each stand representing 40 men.  With the exception of some types of stand having moved to circular bases (more cosmetic than material) and a couple of new markers being introduced everything else looks pretty much the same as the original - which means you can use those troops without any changes. As with the original these rules are based around the d10.

Each game turn is divided into two player turns each of which has three identical phases - Manoeuvre, Musketry & Cannonade and Charge.  The Manoeuvre phase combines movement and morale in a single elegant mechanism.  Musketry & Cannonade allows the opponent to resolve defensive fire before offensive fire is resolved.  And finally Charge is where melee occurs.

Casualties from firing and melee are represented by the removal of stands.  Units have three states of effectiveness - Fresh, Worn and Spent - which is determined by the number of stands lost.  This allows different levels of effectiveness to be reflected (three are suggested Spirited, Reliable and Unreliable) by units being able to have more stands removed before they drop to the next level.

All of this will sound remarkably familiar again to anyone who has played the original rules but there are a number of changes which have been introduced to reflect the different level of engagement being represented.

In Brigade level Fire and Fury a unit's experience (Green, Veteran or Crack) was used to determine its effectiveness; however, in Regimental Fire and Fury these have been expanded to include Trained and contribute their own modifiers and have separate target columns on the musketry table.

Formations remain pretty much the same with line, field column and march column being represented with the main change being line is two stands deep and a single stand deep represents an extended line.

Command radii has taken on something of a new dimension as rather than contributing a bonus on the Manoeuvre table separate columns are included for units In Command and Out of Command which allows for a non-linear impact on the effects.

More granularity has been introduced with regard to weapons (which was mostly abstracted at the Brigade level) with entries for Rifle Musket, Repeater, Breechloader, Inferior Rifle, Rifle Carbine, Smoothbore Musket and Shotgun & Hunting Rifle appearing in the Musketry Fire Point table for example.

There are a number of other changes from the original rules but it looks as if they have incorporated all the changes within the original (excellent) framework and so I am very much looking forward to trying these on the table.  I suspect I may have to develop an aide memoire to the changes which I will post if it's any good.