Monday, 30 May 2011

Project Update: Soviet Invasion of Afghanistan


The idea for this project came from seeing the Mongrel Miniatures Soviet and Mujahideen ranges some years ago. Then Mongrel disappeared and it wasn't until Newline Designs started to import the figures again from their new owner that it resurfaced as a potential project. I was just about to put an order in when I spotted some of the figures on eBay in their original 8 figure packs. Never one to ignore a bargain, I put a bid in and was lucky enough to get them for a really decent price. I then picked up a few other bits and pieces from Newline to fill in a couple of gaps.

The first batch of figures are now back from the painter and I have just started basing them up. I've got a platoon plus a couple of support weapons for the Soviets and about the same for the Mujahideen. The packs I bought also had some figures in winter uniforms and it's these I will be using for my Cold War Gone Hot project (although I had quite a few more to get to bring these up to platoon strength).

In the interim I have picked up a BTR70 from Copplestone (which I believe is the old HLBS range) and am considering getting a BMP or two but at £25 each I suspect that may be a little while off! Other than that I already have pretty much everything else I need in the way of terrain from other projects.

I plan to use this as my first real outing with the new Force on Force rules and I have managed to find a copy of The Bear Went Over the Mountain to provide some inspiration for scenarios.

I'll post some pictures as soon as I have the figure basing completed.

The Mutiny: 53rd Foot

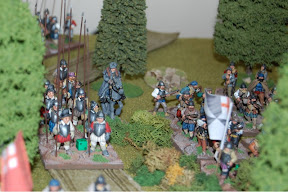
Despite having to pack up my room to put the house on the market, I have still been managing to make a little progress with my various projects. I just finished basing my second unit for the Indian Mutiny - the 53rd (Shropshire) Regiment of Foot - who took part in the relief of Lucknow and earned some 5 VCs during the Mutiny. The figures are from Mutineer Miniatures. Apologies for the photos - they were taken in a bit of a rush!


Saturday, 28 May 2011

The One of Our Satellites is Missing Affair - Episode 1 - Access Denied

Our last game of the weekend was a first outing for 7TV, the new cult TV rules which Lenin had picked up at Salute.  He picked one of the scenarios from the rule book to start us off:

Satellites are going missing. Clues lead our heroes to investigate a private factory, but attempts to enter are blocked by heavy-handed security. Unwilling to wait for their bureaucratic superiors to get official access, the heroes disable the security systems and sneak in. Can they find further evidence of their enemy’s plans?

With two male heroes at my disposal I named them, rolled up their stats and decided on the gadgets - and so Wellington Duo and Vasya Pupkin were born...
Initially our infiltration of the compound went well.  Despite the awkward routes that the seven guards adopted the two agents managed to get to the lab.  Vasya broke out his lock picking kit and opened the main door and they were inside.
After some extensive searching around, the key information was found and a swift exit was made.  It was at this point that things started to go a little awry.  Whilst they were hiding under one of the walkways to avoid the guards above one of the other ground level guards spotted them and opened fire!
Unfortunately neither Duo nor Pupkin were armed with anything more than pistols and so the guard out ranged them; however his aim was a little off so they managed to slip round to the other side of the supporting column.

At this point the guards above spotted them and they came under a hail of fire from the walkway and one of the chemical tanks.  The two agents split up with Wellington rushing around the chemical tank and Vasya fixing a device to the column.  Once attached Vasya sprinted away and there was an enormous explosion as the micro explosive detonated.  The walkway collapsed eliminating the guard on it and blocking the way of the ground level guard; leaving the one on top of the chemical tank as the only immediate problem (the other four guards rushing to the scene were a future issue!).
Meanwhile Wellington donned his climbing suckers and ascended the side of the tank away from the ladder and behind the guard.  Reaching the top he fired his automatic and the guard tumbled dramatically off the tank.

Pupkin had taken refuge behind some barrels but he was discovered by another guard, who had be sent to investigate by the chief henchman.  He easily dispatched the guard but then had to engage in a deadly game of hide and seek to avoid the main heavy.  Slipping away he managed to sprint out of sight and find cover behind some pipes.  Meanwhile Wellington was making his way undetected via a rather circuitous path to join up with him.

The chief henchman wasn't fooled for long and accompanied by another guard started a to search for Vasya.  With discovery imminent Vasya used his miniature laser to cut through one of the pipes near the guards and the contents burst out and almost immediately caught fire.  The guard caught the full force of the blast but the chief henchman was only thrown to the ground.
Under cover of the explosion Duo and Pupkin moved position to nearer the perimeter fence close to where they had originally cut their way in.  But the henchman had only been winded and after picking himself up and dusting himself down he advanced on their position.  Turning the corner he spotted them and took a swing at Pupkin.  Fortunately it missed and Vasya leapt to defend himself.  The two evenly matched opponents circled each other punching and blocking with Vasya using his knowledge of pressure points to try to land a knock out blow.  The henchman was fighting with less finesse but his brute strength was impressive.  Finally Wellington took an opportunity and landed a crippling blow and the two agents were able to escape not only with the information but also with the film from Vasya's miniature camera.

All in all a really fun game and 7TV are likely to return to the table in the not too distant future.

Monday, 23 May 2011

Drama in Dahomey

Following the reunion games Lenin and I decided to extend the weekend and put on another couple of games just for ourselves. The first was a chance for me to get my Dixon Dahomey figures to the table for the first time using Two Hour Wargames' Colonial Adventures rules. Once again Lenin took command of the colonial forces.

The games was set in September 1892, some time after the main French column has begun to advance through the jungle towards the capital Abomey. The column had already fought and defeated the Fon army at Dogba but as a result they need resupply and the objective was to escort an element of the supply column part of the way from Porto-Novo to the main column.

Despite being relatively inexperienced Captain Clouseau was well advised by Sergeant Frakov and put scouts ahead and to the flanks of the supply column. He took command of half the Legionnaires in the van with the remainder under Lieutenant Le Pice at the rear.


With the jungle being somewhat different to their usual postings in North Africa the scouts were understandably jumpy but after a couple of false alarms the column made good progress towards the river crossing. It was here that a sharp eyed Legion scout spotted the Fon waiting in ambush for them.

Shots rang out from the Fon and they had barely been returned by the Legion when the ferocious Amazons rushed headlong into a bloody melee with them. The Captain went down in that first volley but Sergeant Frakov held the men together in the fight.

The superior training of the Legion meant they were able to maintain the initiative and step back and fire at the Amazons between the bouts of vicious hand to hand fighting but the sheer weight of numbers began to take its toll.


Meanwhile the Lieutenant on hearing the firing began to bring the rear guard up to assist; however by the time he got there the advance guard were forming a brave last stand with the Sergeant. Some of the Fon had broken off to loot the supply column but with the Amazons lying dead or dying, the intervention of the rearguard saw them take a number of the mules and flee into the jungle.

With many of the column bearers having fled too the Lieutenant had a difficult job reorganising the column and was forced to use some of the remaining Legionnaires to carry the supplies. And with their diminished number they began the advance once more.

A couple more false alarms unnerved the troops a little but a genuine attacking force was spotted advancing toward them in sufficient time for a firing line to be organised. The firefight was terribly unevenly balanced. After suffering many casualties and inflicting only a few the attackers melted away.

The column then picked up their loads and marched on...

Sunday, 22 May 2011

Moving House?

The powers that be have decided that we need more space and it was either give up my games room (obviously not an acceptable option!) or move.  So I have now had to pack up the games room and return it to it's former life as a bedroom or limit our potential buyers to gamers...

The upshot is that I will be a little constrained on progressing my projects but will try to keep them moving along with some accompanying posts - so please bear with me.

Tuesday, 17 May 2011

Wargames Reunion: Retimo Airfield

Our second reunion game was one Lenin and I had been thinking about for a while - the German assault on Crete - in 28mm using our combined figure collections. We chose to use the Two Fat Lardies' I Ain't Been Shot, Mum! rules as the game was rather too large for Nuts!

The Germans had an ad hoc formation from the 2nd Fallschimjäger Regiment based around the remnants of the 2nd Company, I Battalion and supported by elements of the Headquarters Company, I Battalion, 9th Company, III Battalion and 13th Company. Their objective was to take Hill 'A' which dominated the airfield. Whilst they were facing remnants of C Company, 2nd Battalion, 1st Australian Infantry Regiment supported by elements of 1st Platoon, 1st Australian Machine Gun Company.

Both Lenin and I were playing in the game (largely to take advantage of playing on a larger table than normal - 8 x 6') but decided to let the other players take the lead as we had set the game up. As usualy I played on the German side with Lenin taking the Aussies.

The German plan was to advance up the road on the left flank and secure the farm buildings then move into the woods and secure the other farm at the other end of the table before assaulting the hill itself. Things started to go wrong for them pretty much straight away. They hadn't read the brief fully and so didn't take advantage of the initial bombardment available and then they were spotted whilst still advancing in the open on the road. The Austrailians were dug in on the hill so the ensuing fire fight was somewhat uneven with the Germans pinned in the open gradually taking more and more casualties.


Eventually we managed to take advantage of the limited cover at the base of the hill but our fire was relatively ineffective agaist their position. With no smoke for thr light mortars and assault under heavy fire was going to the very costly and so the attack was stalled pretty much straight away.

Due to some rather poor communication on the German side the blinds advancing down the side of the hill to outflank the Australian position were simply dummies whilst the one behind us in the farm yard turned out to be the third platoon!

Fortunately we were reinforced by a medium mortar and an infantry gun and with their support we started to advance up the hill but it was terribly slow going.


Our plan had been for the morning (real time) to be the evening (game time) and for the afternoon to be the following day. So when lunch (real time) came around the Germans still had not taken the hill. Fortunately for the Germans, the Australians received an order to withdraw (higher command thought they had better intelligence and wanted to consolidate their forces) which allowed the Germans to occupy the hill unopposed. When the Australians realised their mistake the organised a counter attack for the next morning.

During the night the Germans had been reinforced with two medium MGs and an anti-tank rifle team but had run out of ammo for the mortar and had been unable to manhandle the infantry gun up the hill. They reorganised their force into two full strength platoons and started to dig in. The Australians had four understrength platoons with medium MG support and two light tanks for the attack. (At this point I had swapped sides to help with the numbers too)

Unfortnately for the Aussies their troops and armour were almost immediately spotted and came under fire. Even with smoke from the light mortars the attack became heavy going and things began to slow down. One of the light tanks threw a track when crossing the ditch at the edge of the road and the MGs were held up for some reason.

The attack devolved into a rather unequal fire fight and when the second light tanks attempted to move into support it was assaulted by the Germans and caught fire. The only close assault was thrown back by the Germans for little loss on their side and the attack stalled.

The attack then turned into making an orderly withdrawal for the Australians, which proved difficult under the heavy German fire but over half the force managed it.

Monday, 16 May 2011

Wargames Reunion: Battalion Assault

After some time in the planning we managed to arrange a reunion with a few gaming buddies. We all used to be part of the same club but over time have moved to different parts of the country and so only usually catch up individually or at Salute. We decided it would be nice to actually have a couple of games together; however the logistics proved a little challenging but this weekend we managed it.

Our first game was a 20mm WW2 battalion level assault on a French village. Our first task was to actually plan the logistics of the approach to the start line, the preliminary artillery and then the assault itself.

Initally we struggled to sort out travel orders and timings but eventually spotted that it was actually impossible for us to move our troops and attached tanks up to the start line in time for our scheduled kick off. We eventually sorted out the order of march to the debussing point and the final approach to the start line along with the timings in order to scheudle the artillery bombardment. We plumped for a long but possibly rather slow rolling barrage to cover our advance.

With planning completed we moved into the next phase of the game. Almost immediately the plan started to go awry as the road we were planning to use wasn't cleared on time so we were 30 minutes late getting to our debussing area. We then started to move the troops up onto the actual table. Moving through the hedge lined fields proved quite problematic and the units moving up the road found it partly blocked by thre Recce unit holding the start line. Fortunately the MPs attached to the Battalion HQ were able to sort out the jam fairly quickly.


At this point the enemy, who had heard the tanks approaching, started dropping artillery blindly on our moving troops. Luckily we suffered very few casualties and were at our start positions pretty much on time (we had allowed a little time for problems forming up). Then the artillery barrage started and we moved off. Whilst the attack was starting the various MP, medical and other units formed up in the appropriate positions.

Our plan for the assault was relatively uncomplicated. We had deployed our recce and MGs to cover the right flank and the four infantry companies each with tanks attached were advancing two up, two down on the left. A and B companies were intended to push through the hedge line to the left of the village. C and D companies were then to swing right into the village itself and, if necessary, push through to clear the right flank whilst A and B started preparing defensive positions for the anticipated counter attack.


The barrage managed to keep the enemy's heads down and we advanced across the open ground and stream with out too much difficulty. Unfortunately the tanks accompanying D company bogged down in the stream but otherwise things were going well. As the barrage moved on we started to take flanking fire from the village and a minefield was encountered covering the front of the village itself. A and B company started to take defensive fire as we approached the hedge line but a determined advance with the tanks soon put paid to that. Trapped between us and our barrage to the rear their morale cracked and we captured quite a few of the enemy.


Then things started to go a little more awry. With D company without its armour taking heavy fire B company's flank was exposed to the village and it started to take heavy fire and suffered quite a few casualties. Also our force covering the right flank had been spotted and was taking quite a bit of fire too. A combination of mortar and machine gun fire sorted out some of the problem but we took more losses.

Eventually we organised ourselves and C company started to clear the village as planned and the Germans withdrew their remaining troops.

Our next problem was organising thr defence with our now depleted forces and also clearing the minefield to allow the resupply column to reach us.

Fortunately the enemy took some time to reorganise themselves which gave us just the breathing space we needed (although only just!).

The enemy attack consisted of a large infantry force to the right and front supported by Stugs to the left. Fortnately the infantry to the front advanced straight into one of our preplanned defensive boxes and we could drop artiller on them which put paid to that. However, we also lost most of the rest of B compan to enemy artillery fire and some of our tank support to some well placed German anti-tank guns.

Their armour didn't are too well either as our 17 pounders tooke out every Stug that came into sight. Things were looking a little more difficult on the right flank but with the combined fire of C company, our remaining MGs and the anti-tank crews adding their small arms we managed to do enough for the Germans to have second thoughts. This combined with their failure in the centre and on the left meant they began to withdraw.

It was a really fun game especially with the initial planning element. In hindsight there are quite a few things we could have done better - like read the briefing papers more thoroughly and ask a few more questions! But ultimately the barrage was the key, had that been different I think the whole game would have taken on a completely different complexion.

Sunday, 8 May 2011

Stylish Blogger Award

My friend Geordie from Geordie's Big Battles has nominated me for a Stylish Blogger Award on the basis that I started him blogging and, apparently, am also to blame for his insanity (according to his post!)!

I would like to thank Geordie for the nomination and for singling me out as the person responsible not only for his mental state but also for inflicting it on the internet!  Seriously though, it was good of Geordie to nominate me; however, this award seems to have become something of an epidemic across the gaming blogosphere and so I am not proposing to fulfil all the conditions attached to it.  I am supposed to:

  • thank and link back to the blogger who nominated me for this award;
  • share seven things about myself;
  • nominate 10-15 other blogs for the award; and
  • contact the bloggers and tell them about the award.

I have already thanked Geordie and below I will outline seven things about myself (for those who are even remotely interested!) but I don't propose to nominate any other blogs.  It's not that there aren't lots of blogs I follow that deserve nomination, indeed a high proportion of these have already been nominated, but rather it's the feel that the stipulation of numbers of nominations makes this rather like a chain letter (which is something I detest).

I would also like to thank anyone who reads the ramblings I post here and most particularly those who comment - it's nice to know I'm not just talking to myself!

Anyway, here are the 7 things about me:

  1. I was introduced to gaming through AD&D when I was a student but I only found wargaming some time afterwards;
  2. I still have some of the AD&D miniatures that I painted which I bought at the shop which used to be in the basement in Oxford Street about where the Virgin Megastore came and went;
  3. for several years I ran a BBS on Fidonet (before the internet came along);
  4. I don't like points systems - battles are very rarely balanced like that;
  5. I love rule sets which mean the troops don't always do what you tell them - for me that's part of the challenge as a commander;
  6. I haven't bought a boardgame for over a year (because I don't have any space to store any more) but seem to always find space for more figures; and
  7. Wargaming helped me learn how not to be a sore loser (and believe me I used to be)!

Sunday, 1 May 2011

The Mutiny: 32nd Foot

I have just finished basing the first of my Indian Mutiny units - the 32nd (Cornwall) Regiment of Foot from the siege of Lucknow.  The 32nd figures are from Mutineer Miniatures and the civilians from Foundry (the latter are a little smaller - but OK if not mixed in the same unit).

The men of the 32nd

Varied reactions to news of the mutiny

Friday, 29 April 2011

Project Update

I thought it was about time I got my various projects straight in my own mind and so this post can kill two birds with one stone.

Work in Progress

Dahomey 1892: as you may have seen from my last post, I have just finished basing the figures for this project and so I can take this straight from stage 3 (construction) to 5 (complete). I may expand this one in the future to allow bigger games but that's only in the idea stage.

Indian Mutiny: This is currently at stage 3 with the first batch of figures painted (British 32nd and 53rd; 2 units of Mutineers and some Badmashes) and currently on the workbench being based. I picked up the Sikhs, Highlanders, some artillery and cavalry at Salute for the next phase. My next challenge is to add some more suitable buildings to my adobe scenery.

Sudan: Salute saw me purchase some more figures for the phased expansion of my existing Sudan project (which I could have argued was stage 5 until I had these bright ideas!). The first expansion is to allow me to field the appropriate units for the Suakin campaign. So I picked up some more British infantry and some 19th Hussars. Part of the infantry will be painted up to match my existing unit and the balance as RMLI (no not the lifeboat people!) which are quite similar but with white webbing and helmets rather than the khaki. The last part of this phase will be to get the Yorks & Lancs (which will be a nice contrast in their Indian khaki uniforms) and some Black Watch. Then the next phase will be Khartoum - I plan to add some basingers and cavalry to my existing Egyptian troops plus get some Mahdist cavalry/camelry. The final phase (which will be some way off) is to do the Camel Corps.

WW2 Med: Arguably this project is really an expansion of my existing WW2 North Africa project but I decided to cover a larger scope in order to get more use out of the figures. So I could technically argue this is already at stage 4 (pilot) since I have had the DAK and Goumiers on the table. The Artizan US have just come back from the painter and are stuck to bases and I picked up a Corgi Sherman with a suitable colour scheme for Sicily. The GIs have a pretty generic look to enable them to be used for US or US equipped French for the Med and also for Normandy.

WW2 NW Europe: I had already classes this as a stage 5 project but Foundry had a nice offer on and so I picked up their Paras. As with all their Perry sculpted WW2, these are lovely figures and are now painted and stuck to bases. I also picked up some stens and PIATs from Crusader to add to my existing Brits so that I can use them for a little later in the war than I originally intended.

Afghanistan 1979: Having got lucky with some bids on eBay, I have managed to collect a decent range of figures for the Soviet invasion of Afghanistan. Some of these figures will also see service in my Cold War project (see next) and the Mujahideen can also be used for later conflicts too (see Planned Projects below). I intend to try out Force on Force with these when they're ready. The figures are currently off being painted and I have also picked up a Copplestone BTR70 which I will do myself. My Colonial Steamboat adobe buildings will be brought into service for this one too.

Cold War: Having played a game against Lenin's Soviet paras recently it became apparent that I didn't have enough BAOR (not really a surprise as I originally bought these to do Northern Ireland) so I picked up a few more Mongrel packs from Newline Designs - enough to give me a platoon or so. Lenin now has the unenviable job of trying to match the excellent DPM he did on the previous figures! As I mentioned above the appropriate figures from the Soviet packs will be seeing service here too. The upcoming supplement to Force on Force is likely to provide some useful inspiration for this project.

Falklands: Having bought some Royal Marines from Lenin (who bought them back from a friend when he decided he didn't need them as UNIT troopers - after a change in beret colour) I decided that these really should have some historical opposition (as well as being available for the Cold War project) and so added a few Argentinians (also from MoFo). These are also with Lenin for matching to his previous paintwork and since I don't have any painted opposition as yet this s technically a stage 3 project.

Russian Civil War: Having bought the former HLBS interventionist British when I thought they were being discontinued (Tiger Miniatures eventually picked them up) I have not really done any more for this one (basically allowing it to languish at stage 2). I do plan to get some Copplestone Reds in greatcoats but I have been waiting (for quite a while) for Musketeer to release their WW1 Russians in greatcoats (to use as Whites and also for WW1 Eastern Front) to give the project a bit more scope. If these come out or if I get reinspired by something else then this one could easily come back to life.

WW1 Eastern Front: Another stalled stage 2 project (having already got some Musketeer Russians not in greatcoats) awaiting the next Musketeer release.

Montrose: I am currently in the process of rebasing these Redoubt figures individually onto 25mm circular bases to use wit my Warbases movement trays (thus making storage - always a problem with pike - much easier). I still need to find a set of rules I am happy with for these, which is likely to be the key to getting this to the table (although I do have a couple of interesting prospects).

Scarlet Pimpernel: Those old Foundry figures I bought are now painted and stuck to bases. I just need to decide on what finish I am going to do on the bases and assemble and paint the guillotine. I plan to use Gloire for this project and have picked up the Richard E Grant TV shows for inspiration.

Marlburian: Having picked up the first batch of figures from Black Hat I found these had quite a bit of flash on them which has slowed this one down a bit. I need to clean these up, decide which units I want them to be and get them off for painting and then I can work out how best to base them given that I have yet to decide which rules to use (and two of them have quite different basing approaches).

Maximilian in Mexico: Once again I have failed to make any progress at all on this one. The key issue is deciding which rules to use so that I know how many more of which figures I need. I have actually been toying with the idea of movng this one to Sharp Practice but that needs a little more thought.

Vietnam: Technically I bought this at stage 4 but I would like to get a few more figures done before bringing this one to the table. The extra figures are currently with Lenin as he did the originals.

Greek Myth: This has taken a bit of a back seat - largely because Lenin hasn't been inspired to do his Greek figures and he is doing mine too. i know he has been working on some of the Amazons but large areas of flesh are often tricky and I suspect a lot of "research" may have been required!

Planned Projects

First Maori War: The recent release from Empress certanly caught my eye; they're Paul Hicks sculpts and I really like his style. I took the opportunity to pick up the Maori fortification book from the Osprey fortress series (as it was available for quite a discount) and this really looks like it has some potential. I need to get some more reference material as I knew precious little about this one. The Maoris certainly seem to have been formidable opponents and were quite a different proposition from some of the more traditional colonial foes. They were ferocious, well armed and well versed in tactics and military engineering all of which combined gave the British forces a bit of a headache. There certainly seems to me to be enough here for some interesting games.

Modern Afghanistan: Once again Empress are partly to blame for this one (although not Mr Hicks this time) combined with Force on Force. Their modern figures are excellent and are crying out to me to buy them! Of course the key question is whether to go with the US or the new British releases. Both are lovely figures and I am certainly leaning towards the Brits but the selection of weapons in the packs is less ideal - of course this may be sorted in future releases (and I am not planning to get any of these just yet - see the above as to why not!). My existing Mujahideen can easily be morphed into Taliban and the addition of a few more modern weapons would make this quite distinct. The Afghanistan supplement for FoF is likely to tip me over the edge here...

WW2 Poles: I have been keeping my eye on the Bolt Action Polish troops for a while. I really like the figures and early war has always interested me. People seem to think that the Poles just collapsed in the face of the German invasion but this is far from the case. They put up one hell of a fight particularly when you consider that Stalin was invading them from the ther direction as well. But I have held off as thry didn't have any anti-tank support (a slim excuse I know but one I was hanging onto for the sake of the budget!) and then Warlord decided to re-release them with the ATRs and ATGs! Bang goes my excuse - so these may well be being added to the WIP list sometime in the not too distant future!


Blimey, now I have written that all down I am quite surprised as to how much I have in progress. Better stop writing and get on with some of it then!

Thursday, 28 April 2011

Dahomey 1892

HAving just finished basing my Dixon 28mm figures for the Second Franco-Dahomean War, I thought I would post a couple of pictures:

The French Foreign Legion


The Amazons


The Regular Fon

Sunday, 24 April 2011

Salute 2011

Like a very large number of other gamers I visited Salute again this year.  Initially I had thought that arriving very early (due to the trains I wanted not being run on a Saturday - thanks Southeastern!) was going to be a bit of a nuisance; however, judging from some of the comments I have seen from others much further back in the Q-Buster queue I think I was actually quite lucky.

As usual there was plenty of interest (photos of a couple of the games that caught my eye are below) and I managed to pick up the additions to my Indian Mutiny and Sudan projects that I was looking for - which was nice.  I'm not sure whether there were as many people there this year - it felt a little less crowded but that by itself can be a little misleading.  In any event I met up with quite a few friends I hadn't seen in a while which certainly made the trip worthwhile.


Friday, 8 April 2011

Eric's Soul Exchange (or Probability is Only a Theory)

After a rather patchy attendance record of late I've managed to get down to the club two weeks running.  Last week was a 15mm Spanish Civil War game using the TooFatLardies' Triumph of the Will rules and Bronze Mike's lovely figures and this week was a 15mm Ancients outing which is part of an ongoing campaign (the first game of which I played which is an indication of my infrequent visits).

Anyway one of the chaps, Eric the Spy, has a bit of a reputation with the dice.  So much so, in fact, it has been widely suggested that he sold his soul to Satan in exchange for this gift.  Well, last week Eric was on the Nationalist side with me and Jonathan defending a village against a Republican counter attack.  Eric and Jonathan were nicely emplaced in the substantial village buildings and were being frontally assaulted across the open by Crazy Dave.  We all thought this was simply a diversion to take our attention away from their flanking attack, fronted by the redoubtable Iron Mike.  But then Crazy started to exhibit dice skills that made Eric's pale into insignificance.  Of course it was immediately suggested that Eric has franchised his arrangement with Beelzebub and that Crazy was the first applicant!

In any case, Crazy stormed across the open ground and kicked poor Jonathan clear out of his buildings and secured the front of the village.  It was then a battle between the satanically influence dice as Eric was determined to throw Crazy back out again.

Meanwhile I had moved from my reserve position, nice and safe behind the village (ideal for any self respecting Nationalist commander) to cover the flank facing Iron Mike's onslaught.  Things looked touch and go for a little while but then reinforcements arrived in Iron's flank and gave him something to think about!  In the end the Republican assault faltered and we were victorious but looking at the probability of some of Crazy and Eric's rolls was an object lesson that each time you roll the probability is exactly the same irrespective of how many previous good or bad rolls you've had!

Given that both Crazy and Eric were in evidence this week and on opposing sides once again (this time I was a Carthaginian - actually Italian and Spanish mercenaries fighting for them - alongside Crazy) I expected a real rematch.  Whilst there was some evidence of some pretty amazing rolling but nothing compared to the previous week (maybe the Dark Lord was otherwise occupied?).  Yet again I was facing a flank attack from Iron though and things went a little differently this time (probably because Jonathan had sent all our light troops off to support the siege) - fun nonetheless.

Saturday, 19 March 2011

Wargames Weekend: The Photos


If you would like to see larger versions please visit my Picasa album.

Wargames Weekend: The Relief of Fort Kosheh

The final game of the weekend saw a return to the Sudan with an opportunity for me to use my recent Perry purchases and yet another outing for the Colonial Adventures rules. Lenin took command of the plucky Brits and I commanded the Mahdists.

A detachment from 1st Battalion The Queenʼs Own Cameron Highlanders and the 9th (Soudanese Battalion) supported by an artillery battery have been posted to Fort Kosheh.

The Mahdists have been attacking the fort sporadically for some weeks but their activity has now increased and the fort has come under an major assault. Messages have been dispatched requesting a relieving force, which needs to arrive soon...


Captain Cyril "Barmy" Fotheringay-Phipps, the officer commanding the fort, deployed his forces in defence despite sporadic rifle fire from some buildings overlooking the fort to the rear. The first Mahdist attack came toward the front wall. The egyptian artillery crew struggled to redeploy the gun to face the attack and the highlanders began a steady volume of fire into the approaching mob. The Mahdists took many casualties but came on and reached the wall where they set their ladders and began to climb. Despite his earlier exclamation that they were "all doomed!" Sergeant Jock Frazer steadied his men and ensured continued volleys into the enemy.


However, despite the steady British fire their numbers of wounded was rising and the Mahdists reached the top of the wall where a vicious melee ensued. The Mahdist numbers won out and they took a section of wall. Captain Fotheringay-Phipps kept a cool head and ordered the sudanese defending the other walls to about face and loosed a devastating volley into the Mahdists. This combined the rising casualties from the continuing fire from the tower was too much for the Mahdists who broke and fled.

With the attack repulsed Barmy redeployed his men again; this time to deal with the riflemen on the overlooking buildings. Concentrated British rifle fire combined with the egyptian cannon gradually took its toll and the rifle fire became more sporadic. Counting his losses Barmy was considering his next move when another threat appeared. This time a large mob of Fuzzy Wuzzys emerged from the scrub beyond the town, hell bent on charging the walls of the fort.


Another reshuffling of their steadily diminishing numbers saw the garrison ready to face this latest assault. This time their fire was properly co-ordinated and after a couple of particularly effective volleys the Mahdist attack faltered and they fled.

Meanwhile a relief column from Suakin was approaching commanded by Captain Hildebrand "Tuppy" Glossop with troops from the 1st Berkshires, some more Egyptian troops and a Royal Artillery screw gun.

The column advanced steadily towards the town but as they thought they would reach it unmolested an enormous horde of Mahdists appeared from a wadi to the flank of the leading Egyptians and charged!


The Egyptians hurriedly formed line but could not get off enough fire to stop the charge before it reached them. The Mahdist number soon began to tell and the Egyptians were losing men left, right and centre.

Tuppy kept his head and deployed the Berkshires in a line to the left rear of the Egyptians and poured fire into the Madhists. Eventually the Egyptians could hold no longer and their few remaining men withdrew behind the British line leaving the Berkshires to face the full force of Mahdists. The Berkshires remained steady and continued to fire into the Mahdist horde until it reached their line and a bloody melee began. The superior Mahdist numbers were grinding down the British defence but eventually the British discipline showed through and the attack was broken.

However, it was a much depleted column which arrived to relieve the fort...

Wargames Weekend: The Point, Peleliu 1944

Our penultimate game was yet another outing for Nuts!, this time in the PTO. This game was planned largely to allow us to try out the War Against Japan (WAJ) supplement and get some of Lenin's lovely TAG Japanese and US Marines to the table.

WAJ is really intended for US troops to be player controlled and for the system to run the Japanese but since Lenin is only part way through this project we decided that it would be better if I controlled the Japs. WAJ also uses different reaction tables for the US and Japanese troops which we were hoping would add to the period feel.

I was given a platoon of two rifle squads, an MMG squad and their HQ along with a Type 97 Te-Ke tankette. The infantry were all Rep 4 with Rep 5 officers and NCOs but I had to roll for the tankette crew and got a rather uninspiring Rep 3 for the commander/gunner.

I didn't have high hopes for the tankette as I knew the Japanese tendancy to miniaturisation wasn't idea for armour but even so I was surprised at the thing's size - frankly it looked like it was the right scale. But Lenin assured me that not only was it the right scale the US troops had actually put one onto the read deck of a Sherman at one point! Given that Lenin had asked me whether my Sherman was handy I was a little nervous...

The table was laid out with a beach at the east end, jungle to the west, the rocky point to the south and rough ground to the north, where the US troops were dug in. The centre was pretty open (unfortunately).

I decided to have one section advance from the point across the open ground and the balance of the force advance through the jungle to try to outflank the US troops with the tankette moving along a small path in between the point and the jungle. Given that it was a night attack visibility was limited.


My first squad split into two teams with one advancing with the other covering and things started well. But when we moved within sight of the first US troops a fire fight began. The Japs hit the deck with one man down. As soon as we got the initiative I got the men up, threw some grenades and rushed the US slip trench. Another man went down in the charge but after some bloody hand to hand fighting the trench was taken. It transpired that the US had been hampered as we had encountered their bazooka team and so they were a little undergunned against infantry. Probably a good thing as my men had the squad knee mortar and lunge mine!

The other half of the squad advanced and triggered fire from another US slip trench and again hit the deck. Fortunately the tankette could advance in support but with no MG and a rather poor gunner it turned out to be rather less helpful than I was hoping. Whilst this was going on I had the other squad rush out of the US position they had captured to assault the next in the flank. The combination of more firepower on the US side and more bloody hand to hand meant that, whilst I took the position, that group were decimated.

It turned out that the other US position also contained their officer (who Lenin decided was in the John Wayne mould) who decided to deal with my tankette. He prepared a grenade and charged the tank single handed. Whilst the grenade didn't penetrate the tank crew took fright and withdrew!

Whilst this was going on the remainder of the Japanese force had been making their way through the jungle. When they reached the edge they came under US fire from a couple of positions and were force back briefly. I decided on the same approach and, grenades prepared, threw then and rushed the trenches bayonets fixed.


It was at this point that the Sherman made its appearance! So I had the remainder of the men charge the tank. The melee was terrible with the Japanese officer slashing right and left with his sword and small arms and bayonets being used with bloody efficiency at close range. Finally the Japanese took the main US position on this side.

Things went rather differently with the assault on the tank. The US crew used their hull, turret and hatch machine guns to great effect and cut down many of the Japs including the man with the lunge mine! But a couple still got through, slipping under the machine guns and used their grenades. The US tank commander was killed in the blasts and the tank crew then began sweeping their turret machine gun around to try to deal with the danger clinging to the hull of their tank.

With the Japanese having more than achieved their objective in US troop casualties and having lost a large part of their force we decided to call the game. I have to say that I am now not looking forward to having to face the Japanese when we play the next game in the campaign!

Monday, 14 March 2011

Wargames Weekend: Trouble in Tunisia

For our fourth game we returned to Nuts! but for the war they were originally written for - WW2. In this case a scenario in North Africa using my newly acquired 28mm Artizan figures.

Following the failure of the push towards the important road junction of Pont du Fahs, after the sudden appearance of German tanks, General Maurice Mathenet's Division de Marche du Maroc) have withdrawn into the Eastern Dorsale mountains. You have been ordered to hold your positions there, avoid pitched battles and wage a guerilla war to tie down German resources.

The French unit, from the 3rd Tabor of Lt. Col. Leblanc's 1st Groupe de Tabors Marocains, was given the objective of attacking a DAK supply dump. Lenin took command of the Goumiers and decided to attack at night.


The Goum decided to split their force in two and attack with a section each from two directions, the first from the ridge behind the fuel dump and the second from the south west across some open ground towards the main supply dump.

The attack began well with the DAK sentries happy to remain in their fixed positions and so the Goum were able to sneak up to the wire and cut it without being spotted. Each section then sent a group through the wire covered by another fire group. The group, led by the Lieutenant, nearest the fuel dump nearly tripped over an alarm wire (with the traditional tin cans) but spotted it at the last minute. Whilst the group attacking from the south west swiftly and stealthily approached the first building.


The Lieutenant's group moved down the side of the sandbag wall at the side of the fuel dump, concealed from the DAK sentries in the nearby two storey building but were then in a quandary - to advance further risked being spotted by the Germans and the game would be up but to remain where they were would limit the damage they could achieve.

The other Goum group successfully entered and cleared the ground floor of the first building and decided to ascend to the roof to deal with the two sentries there. Two Goums managed to sneak up the stairs and rush the two sentries but one must have stumbled because in the ensuing melee one sentry was killed but the other bested his Goum. The two remaining men faced each other but the DAK sentry decided he needed to escape to raise the alarm. As he turned, the Goum was on him and it was all over in a few seconds. With the building completely secured the Goums called in their second group. The Lieutenant decided to do the same to chance rushing their DAK sentries.

With the attack advancing well and to plan things were looking good for the French force; however, unbeknownst to them, the DAK Feldwebel had decided that now was a good time to conduct a check on the sentries and the wire. He and another man began moving around the wire just at the time the second south western Goum group was moving through the break in it. The Goums spotted the Germans first but decided just to cover them, hoping to avoid raising the alarm. Unfortunately, the Germans spotted the Goumiers but as they raised their weapons to engage them they came under fire from the French. One DAK solider fell in a hail of automatic weapon fire but the Feldwebel was unscathed and ran back to the safety of the machine gun post guarding the main entrance. The Goums kept the initiative and rushed the guard post but the MG34 team spotted them as they emerged from the dark and opened fire. One Goum was killed but the second hit the deck and returned fire killing the MG gunner and making the loader duck back behind the sandbags. The remaining Goums then rushed forward to the sandbag position. Unfortunately the Feldwebel must have heard them as he readied and dropped a grenade over the top of the sandbags. The grenade exploded taking out several of the Goums but when the MG loader grabbed the MG34 to look over the side he was shot by one of the survivors. The Feldwebel prepared a second grenade but fumbled when throwing it and was forced to dive for cover as it exploded on his side of the sandbags. The Goums seized the opportunity and stormed the position killing the cowering German.

With small arms fire having given the game away the Lieutenant decided now was a good time to deal with the sentries overlooking his position. His men popped up and were spotted by the sentries, who opened fire, but the French won the ensuing firefight.

The firing had alerted the remainder of the German garrison who struggled into their boots and to find their weapons in order to respond. Meanwhile the Goums continued to advance and also to set some of the explosive charges they had brought with them in the fuel dump.

The Germans mustered in the courtyard of the headquarters building and some were sent to the second floor positions to assist with the defence. The first men peered over the parapet to see the French advancing down the road, mostly using the shadows at the base of the building's walls. The Goums who were covering the parapet opened fire but lost the firefight and the remaining DAK soldier readied and dropped a grenade into the midst of the Goum force to devastating effect. With their advance hampered by another German sentry position the Lieutenant's group were trapped under the wall and yet another DAK grenade caused more casualties.

The other Group were fairing a little better having forced the sentry overlooking the main supply dump to keep his head down, they leapt over the packing crates to set their charges.

The rest of the German garrison then began to emerge from the HQ building to go to their ready positions. The first team, whose ready position was the MG34 post, were in for a surprise when they came under machine gun fire as they approached the position but neither were hurt as they took cover behind the wheels and engine block of a parked kubelwagen. They managed to ready some grenades and, in a co-ordinated throw, lobbed them into the MG pit taking out the Goums there.

At this point the remaining Goums withdrew gutted at having to leave their wounded comrades but had the satisfaction of hearing both the fuel and supply dumps go up in a massive explosion.

Sunday, 13 March 2011

Wargames Weekend: Quebec 1759

Both Lenin and I have picked up the Black Powder rules and wanted to know whether they were actually any good under the excellent presentation.  So I decided to pull out my 15mm Essex French & Indian Wars figures and developed a scenario based on the Battle of the Plains of Abraham outside Quebec in 1759.  I chose to make the scenario a conjectural one with some additional French turning up on the British flank (which they were concerned about at the time) to avoid it being a bit of a walkover for the British.

Lenin took the role of General Wolfe and I took Montcalm.  We both deployed our forces pretty close to history and then the playtest began.


Pretty much straight away we realised the command and control mechanic could make things pretty difficult if the dice weren't with you.  This wasn't the only area where the dice made a huge difference.

Initially the British brigades advanced in a pretty co-ordinated way with only a minor problem keeping the brigade on the flank in contact; however things were a little more challenging for the French.  With a historical deployment the French had two units in column in the centre of their line and in trying to redeploy to allow them to expand things didn't quite go to plan.
The Chevalier de Levis seemed incapable of getting his brigade to respond to his orders effectively and, as a result, a hole opened up in the French line.  Fortunately the British advance was being held up by the French artillery and both the Louisbourg grenadiers and the Highlanders were taking a bit of a pasting.


The slowing of the British advance allowed the French to redress their line and then  musket fire started to be exchanged.  It was at this stage that the effect of some unlucky dice rolling became quite apparent.  Lenin was spectacularly unlucky with some key throws when Break Tests were needed and some of his units fell apart.

With things beginning to look up for the French the British struggled to reform their line but managed to inflict enough hits on a couple of key French units to require some more Break Tests.  With these tests passed the two French brigade commanders issued Rally to Me orders but in joining the units they exposed themselves to danger.  More musket fire was exchanged and it was at this point that luck deserted the French.  With more Break Tests initiated for the two units with the commanders attached they both failed spectacularly and fled taking the commanders with them.  This put paid to the French advantage and, at this point, it became clear that, with the third British brigade occupied defending the rear of the British line from the newly arrived third French brigade the British didn't have the superiority in numbers to follow up their newly found advantage.  We had also run out of time so we called the game a draw.

Saturday, 12 March 2011

Wargames Weekend: A Bridge in Time

Next up we turned to an old favourite - Nuts! by Two Hour Wargames - but this time with a more modern subject, 1986 West Germany, for a conjectural World War 3 scenario.

Elements of the Soviet 103rd Guards Airbourne Division have dropped on the NATO nuclear storage dump at Niedermarsburg, seven days after the commencement of general hostilities. The Soviets have resorted to chemical warfare to restore the impetus of their flagging offensive and wish to eliminate any NATO nuclear response. The British 5th (Volunteer) Battalion of The Queen's Regiment, acting as rear area security for BAOR is rushed to eliminate the threat. On the outskirts of Aro.sen they bump into the first Soviet outpost guarding an important bridge.

Having only a single section and a Saxon APC I was a little wary advancing towards the enemy threat. I dismounted the men and advanced them through a wood to clear the way before bringing the vehicle forward.


We managed to set up the GMPG covering the bridge without the Soviets spotting us and I sent the rifle group to secure the farmhouse to the left of the road. With the other men covering, the Lieutenant and another man rushed across the side road, over the wall into a field and took up a position covering the rear of the farm house from behind the garden wall. The remainder of the group then advanced to their position. Once in place the Lieutenant took the lead again and rushed to the rear of the house with another man and checked whether it appeared occupied. It seemed as if the occupants had left in a hurry but that the place was empty to the team entered and cleared the building. This done they took up positions at the front and rear of the house.

With the farmhouse secured I sent the Corporal and two other men across the main road to clear the barn. Unfortunately their rush across the road was spotted by the bridge guards and they moved to their LMG. My GMPG team opened up on them and the gunner was killed and the loader fell back to the house behind their position.

I thought things were going pretty well and was preparing to advance toward the bridge, so I called the APC forward. It was at this point that we spotted that the Soviets were supported by a BMD-1 which had a clear view of the road.


It was too late to call off the Saxon but fortunately the BMD didn't spot it and I got it into a concealed position behind the barn.

It was at this point things started to come seriously unravelled. One man, trying to get a bead on the BMD from the loft of the barn attracted the attention of another group of Soviet paratroops and came under heavy fire.

The Lieutenant took one man out of the rear of the farmhouse to try to get into a position where the could open up on this new paratroops group but was spotted. Heavy AK74 and coaxial machine gun fire from the BMD saw both the Lieutenant and the the other man killed.

I now found both of my main teams trapped in their respective buildings and the GMPG team unable to get line of sight on any of the enemy. So I tried to get a couple of men out to lay down some covering fire so we could move. Unfortunately both men were spotted and the ensuing fire put both of the out of the fight.

At this point the Corporal thought discretion to be the better part of valour and ordered the remainder of the section to withdraw under the cover of smoke taking the wounded with them.

Wargames Weekend: Breakthrough - Connaught 1599

Time for yet another wargames weekend with Lenin. We have a couple of new rule sets to test out this time so we started off with Tudor Ireland using the To the Banners rules by Stephen Danes. It was also a chance to get my Vendel and Graven Images figures to the table again along with the Warbases movement trays which I picked up to do just this sort of larger game.

The scenario was taken from the rules and involved the English troops advancing up a valley through some woods in an attempt to break through to relieve another English force. The Irish had laid an ambush having blocked the road at the most difficult point for the English to pass.

Things started fairly slowly with the English pike advancing in column up the road flanked on both sides with units of shot. The Irish faced them with four units of Kern with their Gallowglas held in reserve further up the valley.


The English advanced slowly toward the Irish barricade and opened fire on the Irish troops. Eventually the English pike summoned up the courage to charge the Irish who stood their ground. It was not an even match and the pike pushed the kern back again and again until having taken as much punishment as they could they turned and fled. The English pike pushed on into the next unit of Kern with similar results whilst the Gallowglas looked on unable to respond.


With the English pike advancing but their shot stalled at the edge of the wood the pike now came into contact with the lead Gallowglas unit which was a more even match. The charged and the Gallowglas, probably seeking revenge for the Kern, counter charged. A bitter struggle ensued with the units evenly matched. Then suddenly the tables turned and the Gallowglas managed to get the upper hand pushing the pike back until eventually they routed.

With the English pike streaming back through their ranks the English troops were disordered and back to fall back. With the English attack faltering the Irish took to their heels to set up another ambush further along the path of their advance.

After the game we spent a little while reviewing the rules. We liked the innovative approach to the initiative mechanic which provided some real command and control issues for both sides. Although the rules had some significant omissions which did call into question how thoroughly they had been playtested and could have been laid out in a more accessible manner. We plan to give them another go with a more conventional set of forces to see how they perform.

Monday, 21 February 2011

Project Update

With the year rushing by I thought it would be a good opportunity to pause and consider progress with my various projects.

28mm Sudan
This is progressing nicely and I am really liking the Perry figures. I am planning to keep expanding the collection slowly with my next purchases at Salute. I am thinking Yorks & Lancs and Hussars as the next phase but I'm not sure which way to go after that. The Perry's have such a wide range it is difficult to stay focussed. Mahdist cavalry are a real possibility but I would like to get some Naval Brigade or some Bashi Bazouks...

28mm Indian Mutiny
My first batch should be back from the painter shortly which will give me some more basng to do (I need to work out which foliage to pop on these!). Next I would like to add some more of the lovely Mutineer figures. Cavalry a real possibility but I would also like some Sikhs though. Then I really need to find some suitable walls for a larger siege.

28mm North Africa/Med
With the Afrika Korps and Goumiers hitting the table shortly, I have managed to pick up some more Artizan US infantry figures nicely priced on eBay. I plan to use these as US equipped French but I can also use them for more mainstream American troops both for the Med and for North West Europe (including The Big Hurt)

15mm Marlburian
After a lot of thinking I have finally plumped on some figures which I will be picking up at the Tonbridge show. These are, however, only a start and this projec is likely to run for a while. The next main decision is which rules to use, I have a few candidates but need to try them out before deciding.

28mm Montrose
After having had these figures around for quite a while but couldn't decide on which rules to use and then got distracted. I have a couple of candidates to try out and I've found some nice flags which I hope will finish the figures off. I was a little concerned about storage, especially with the pikes. With my Tudor Ireland having grown out of my Border Reiver skirmish project the figures were all individually based, making storing straightforward. The Warbases movement trays enable me to have the best of both worlds and I plan to use the same approach for the Montrose figures.

28mm Moderns
I was extremely fortunate to pick up some Mongrel Soviets and Afghans on eBay recently (handy as I understand Newline may be having problems with supply). These will allow me to do the Soviet invasion of Afghanistan but also allows me to use some of the Russians against my BAOR figures for what if WW3 scenarios in Europe.

Obviously with all these progressing I have decided to put a hold on my other ideas for the moment.

Wargames Weekend Planning

With another visit from Lenin coming up in a couple of weeks I have been trying to put together a few games. I've got three planned which are a mix between getting new toys to the table and trying out new sets of rules. In both cases I am using the term "new" in a fairly lose way as in couple of cases I have had them a while but haven't used them! Currently on the agenda are:

28mm Sudan - a chance to try out my Perry Highlanders, Egyptians and Mahdists

28mm WW2 North Africa - new figures again, this time the Artizan Afrika Korps and Goumiers but also trying out "vanilla" Nuts! 2.0

28mm Tudor Ireland - whilst some of these figures have had an outing before, this is a bigger scenario and so will get most of my collection tabled. It's also a chance to try out the To the Banners rules and use my Warbases movement trays I have just finshed.

15mm French & Indian Wars - this is really a chance to give the Warlord Black Powder rules a go to see whether they are something we want to add to our regular rulesets. They're so nicely produced I really hope we're going to like them!

Saturday, 12 February 2011

More Mahdist War

I thought I would post a few pictures of the figures I have just finished for my Mahdist War project. First the British officers:


Then the highlanders:


And finally the opposition:


They are all 28mm figures from the Perrys.